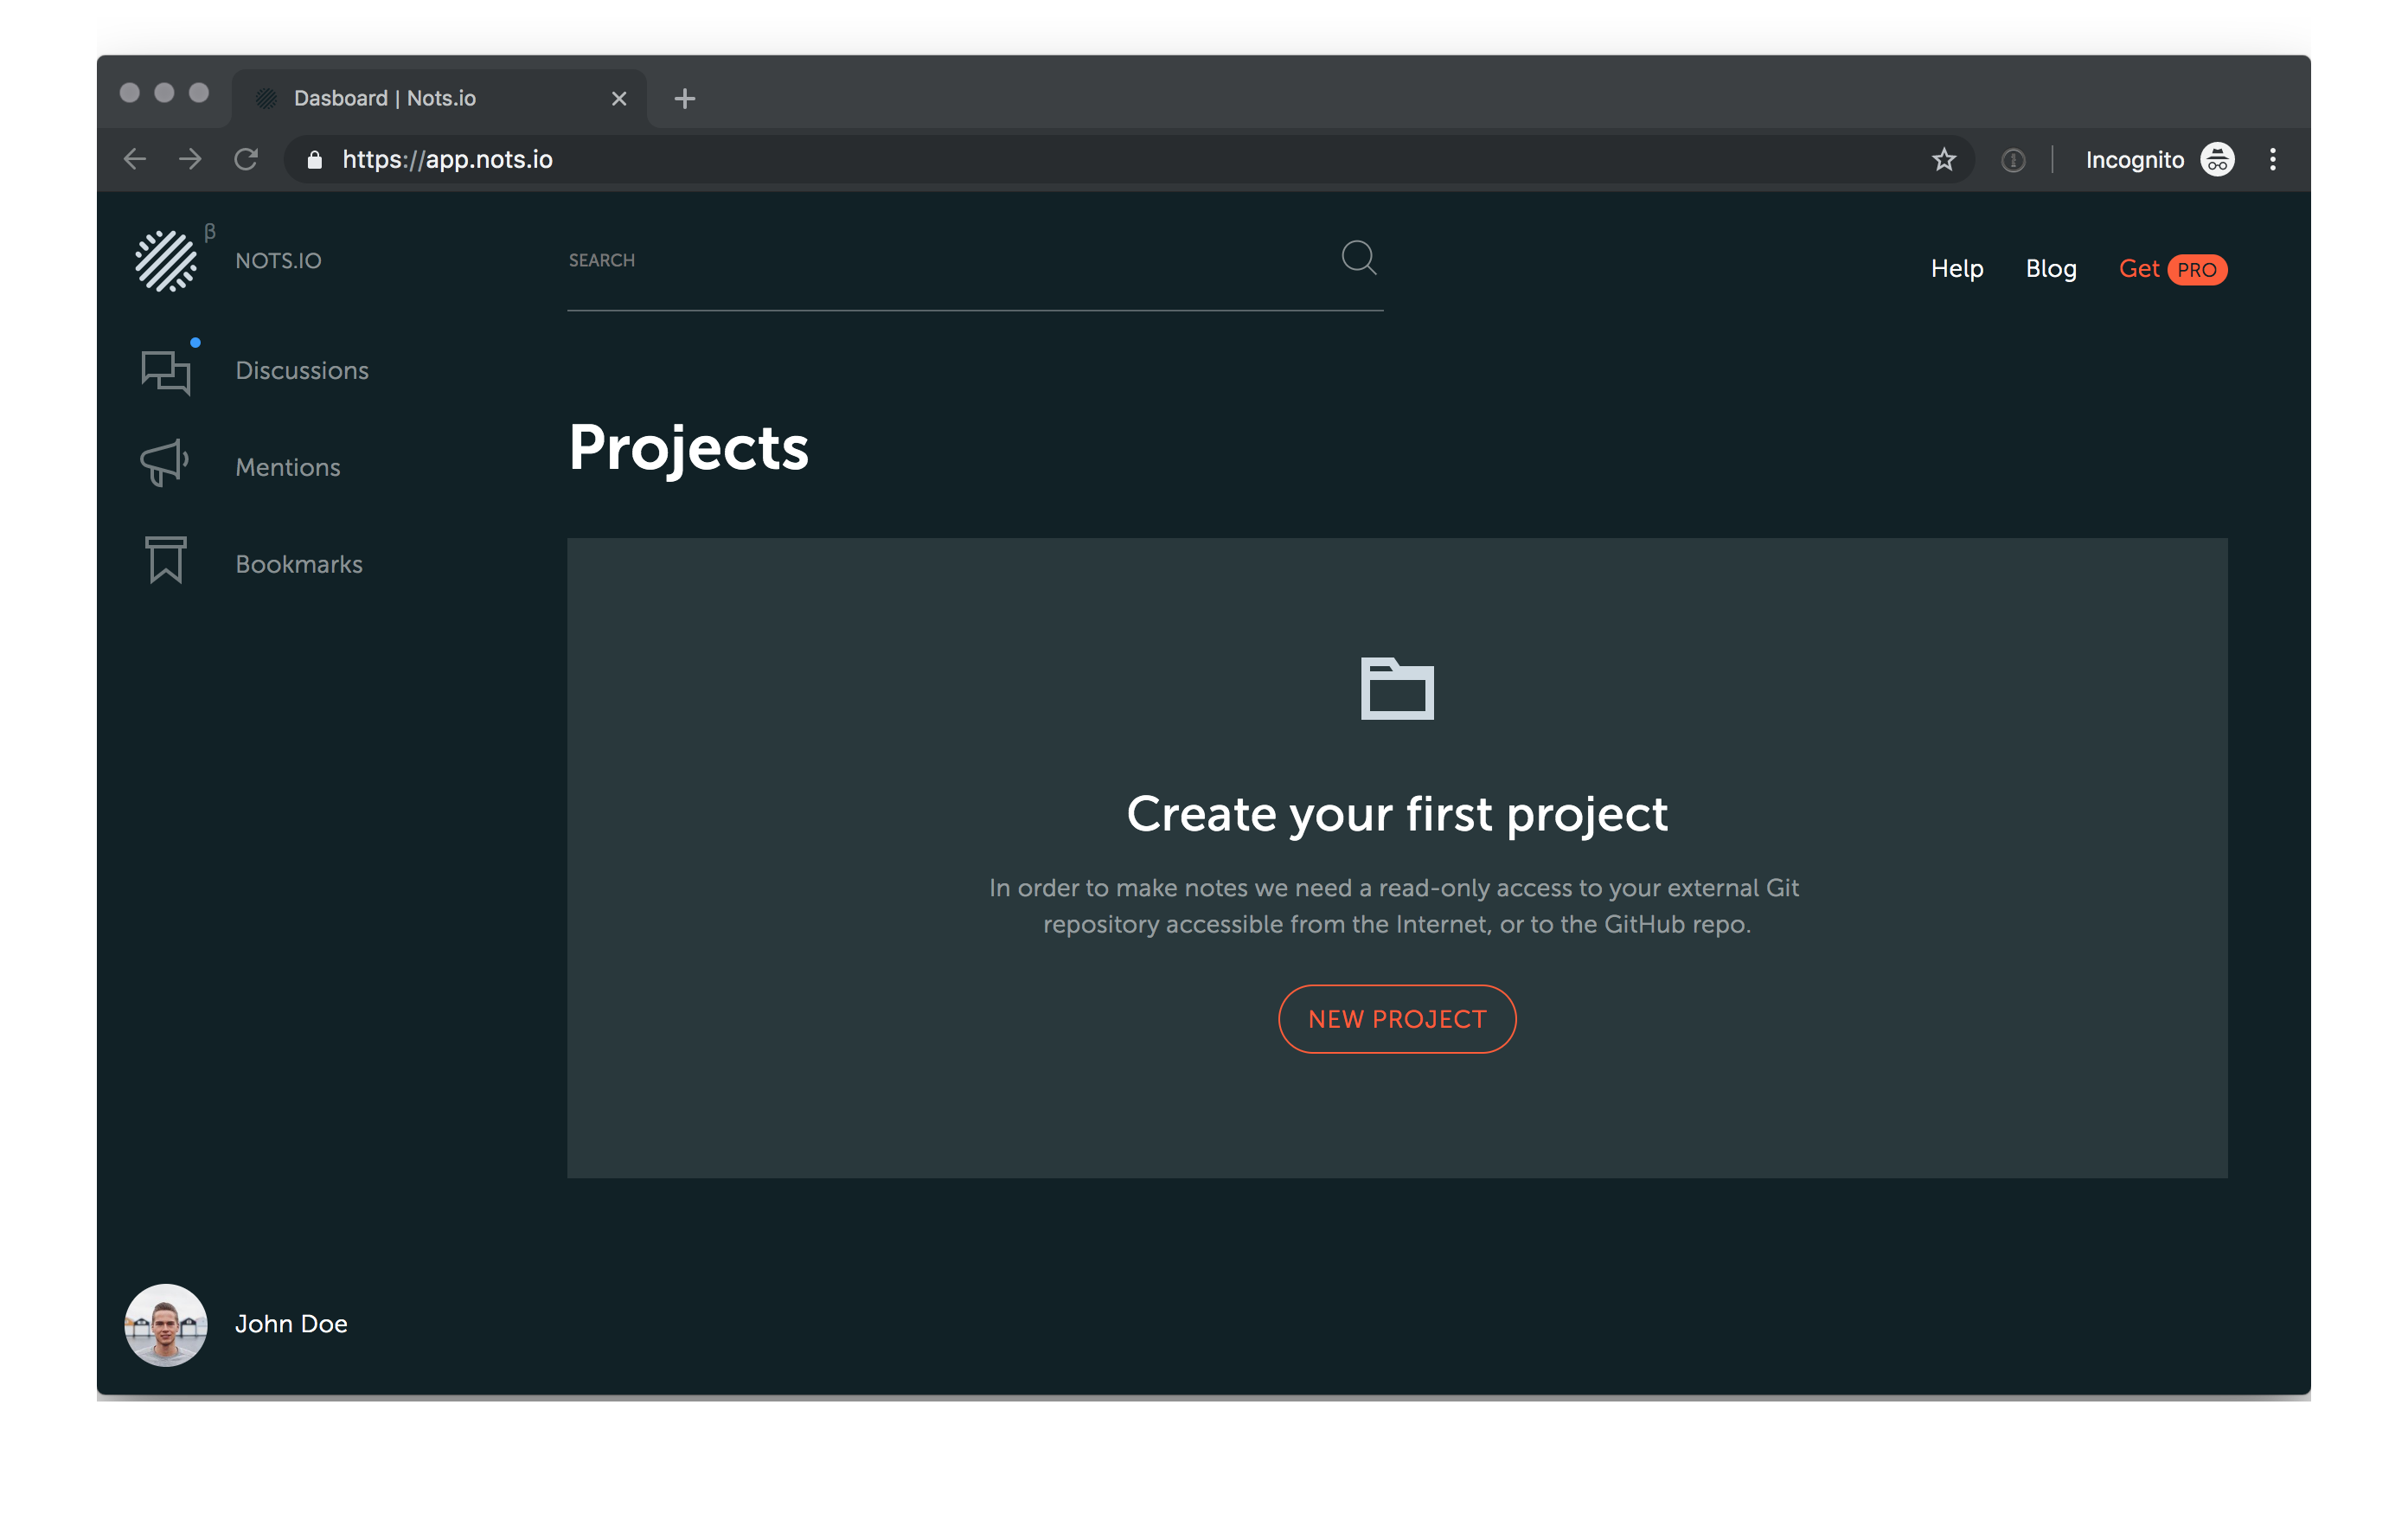
After creating an account and verifying your email address, you’re welcome to create the first project. In terms of Nots, the project reflects your Git repository.
There are two types of projects available:
- Public. And free of charge. This type of projects are visible to every Nots user. Both code and notes is accessible to everyone. Public projects are full-featured and we’re not limiting the number of such projects per user.
- Private. These projects are visible and reachable only for explicitly invited members. We do care about your data so we keep these projects encrypted. There are two flexible pricing plans for private projects: per project, with an unlimited number of invited teammates in it. And per user, when your company has dozens of projects/repos to work on.
Check available prices on the main page
Create and name your project
Click “New Project” button.
On a new project page, give your project a descriptive name. Optionally add a description and upload an avatar photo.
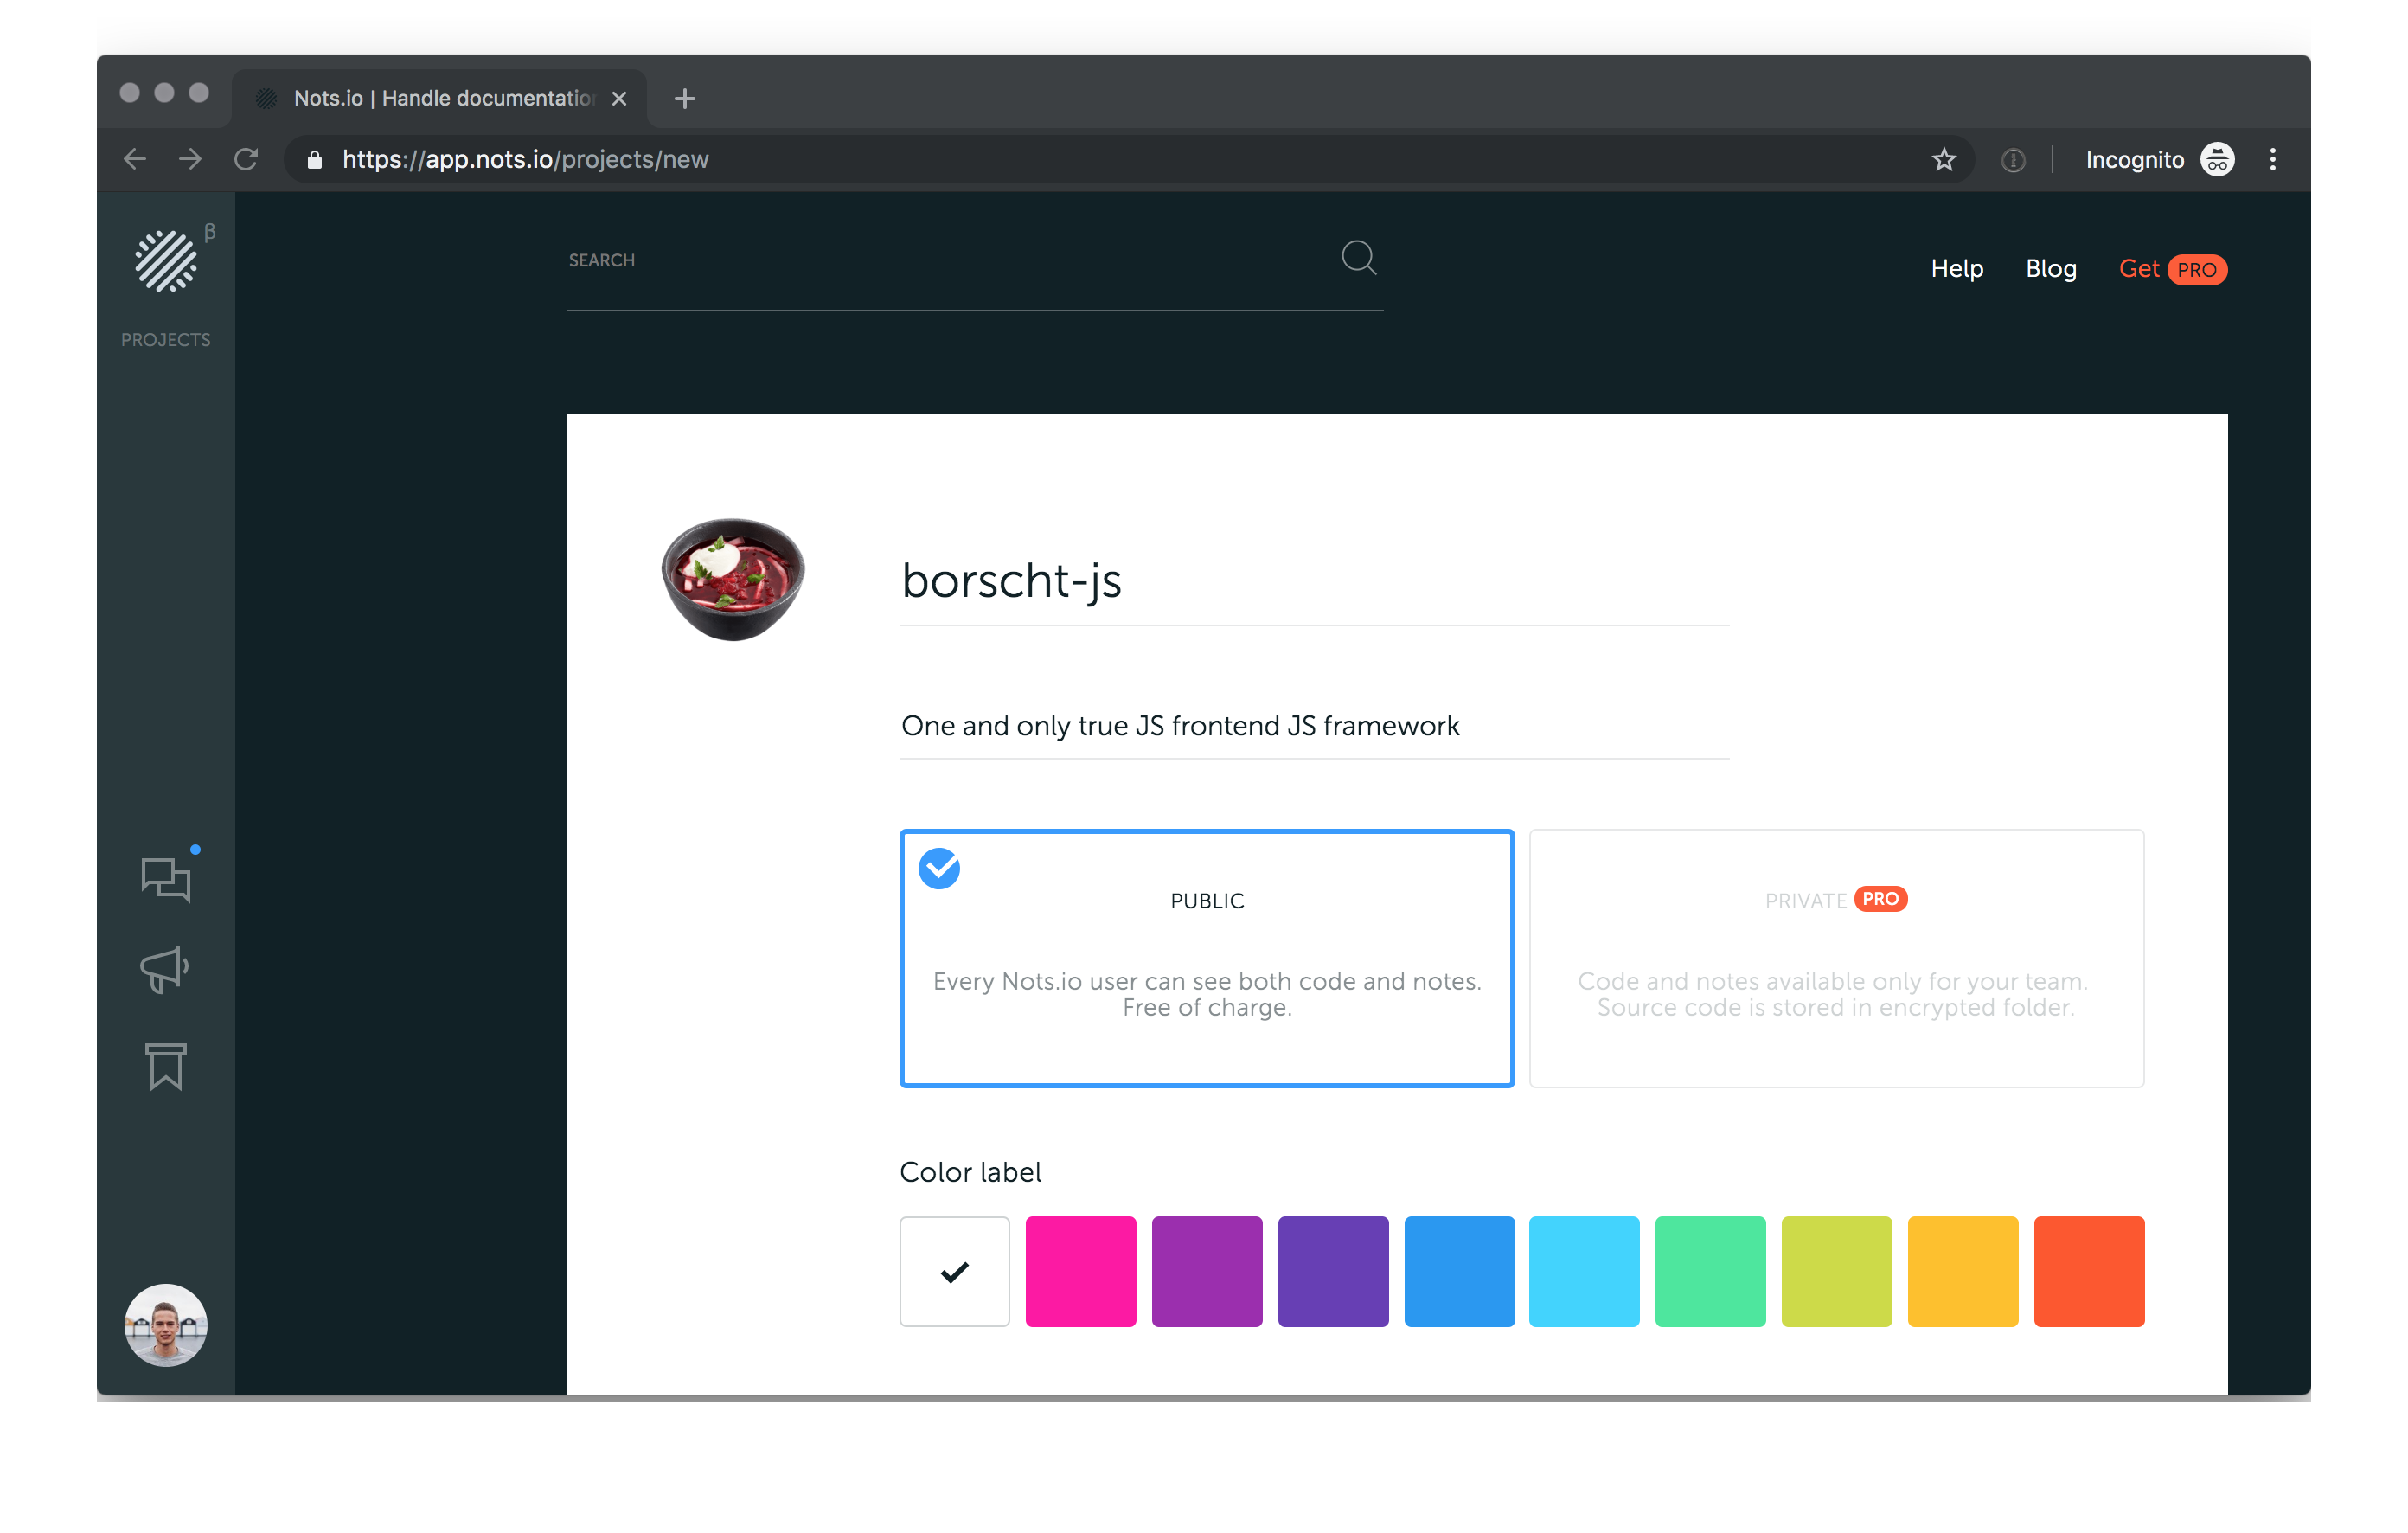
Choose the project type.
If you registered as a paid PRO-user, you’ll be able to create private projects. Otherwise, only public projects option is accessible. You can change your billing type to PRO account at any time. Click on your avatar in left bottom corner and choose “Billing” menu.
Optionally choose a color label to quickly navigate through your projects.
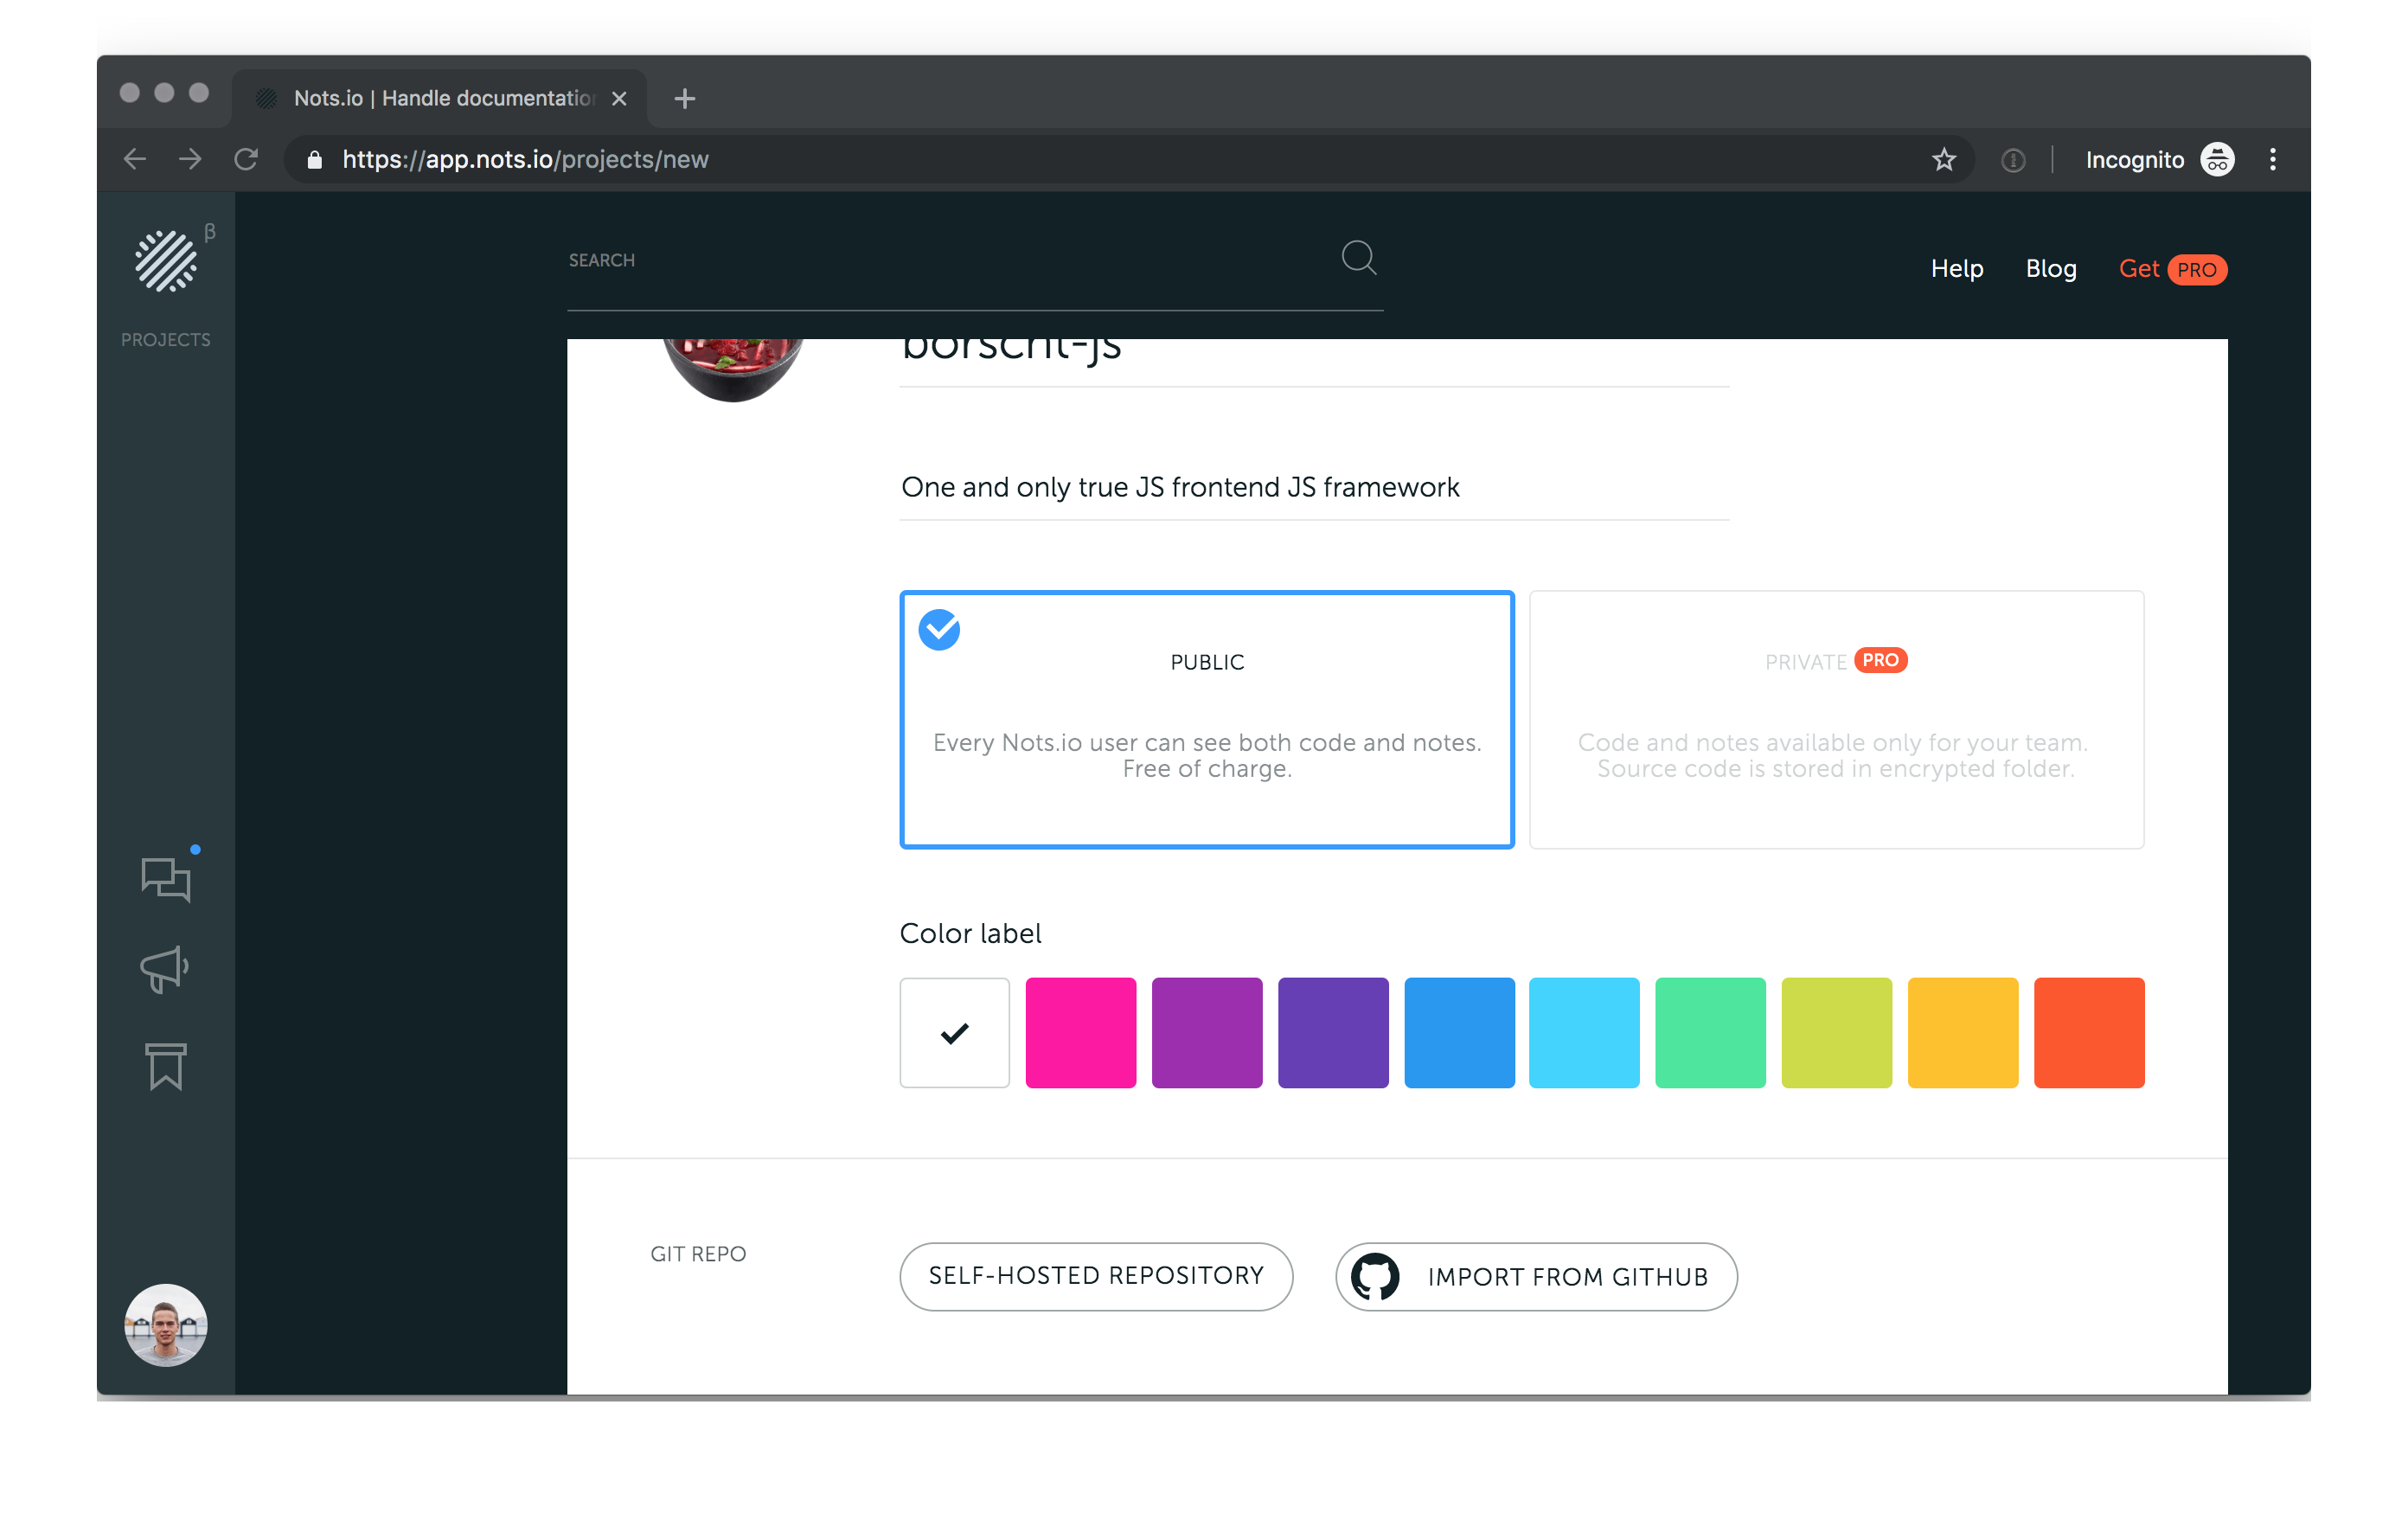
Git repository settings
Nots tracks changes in your Git repository. Set a proper configuration to access the repository. Right now Nots supports two options: your own self-hosted repository, available from the Internet. And GitHub repositories.
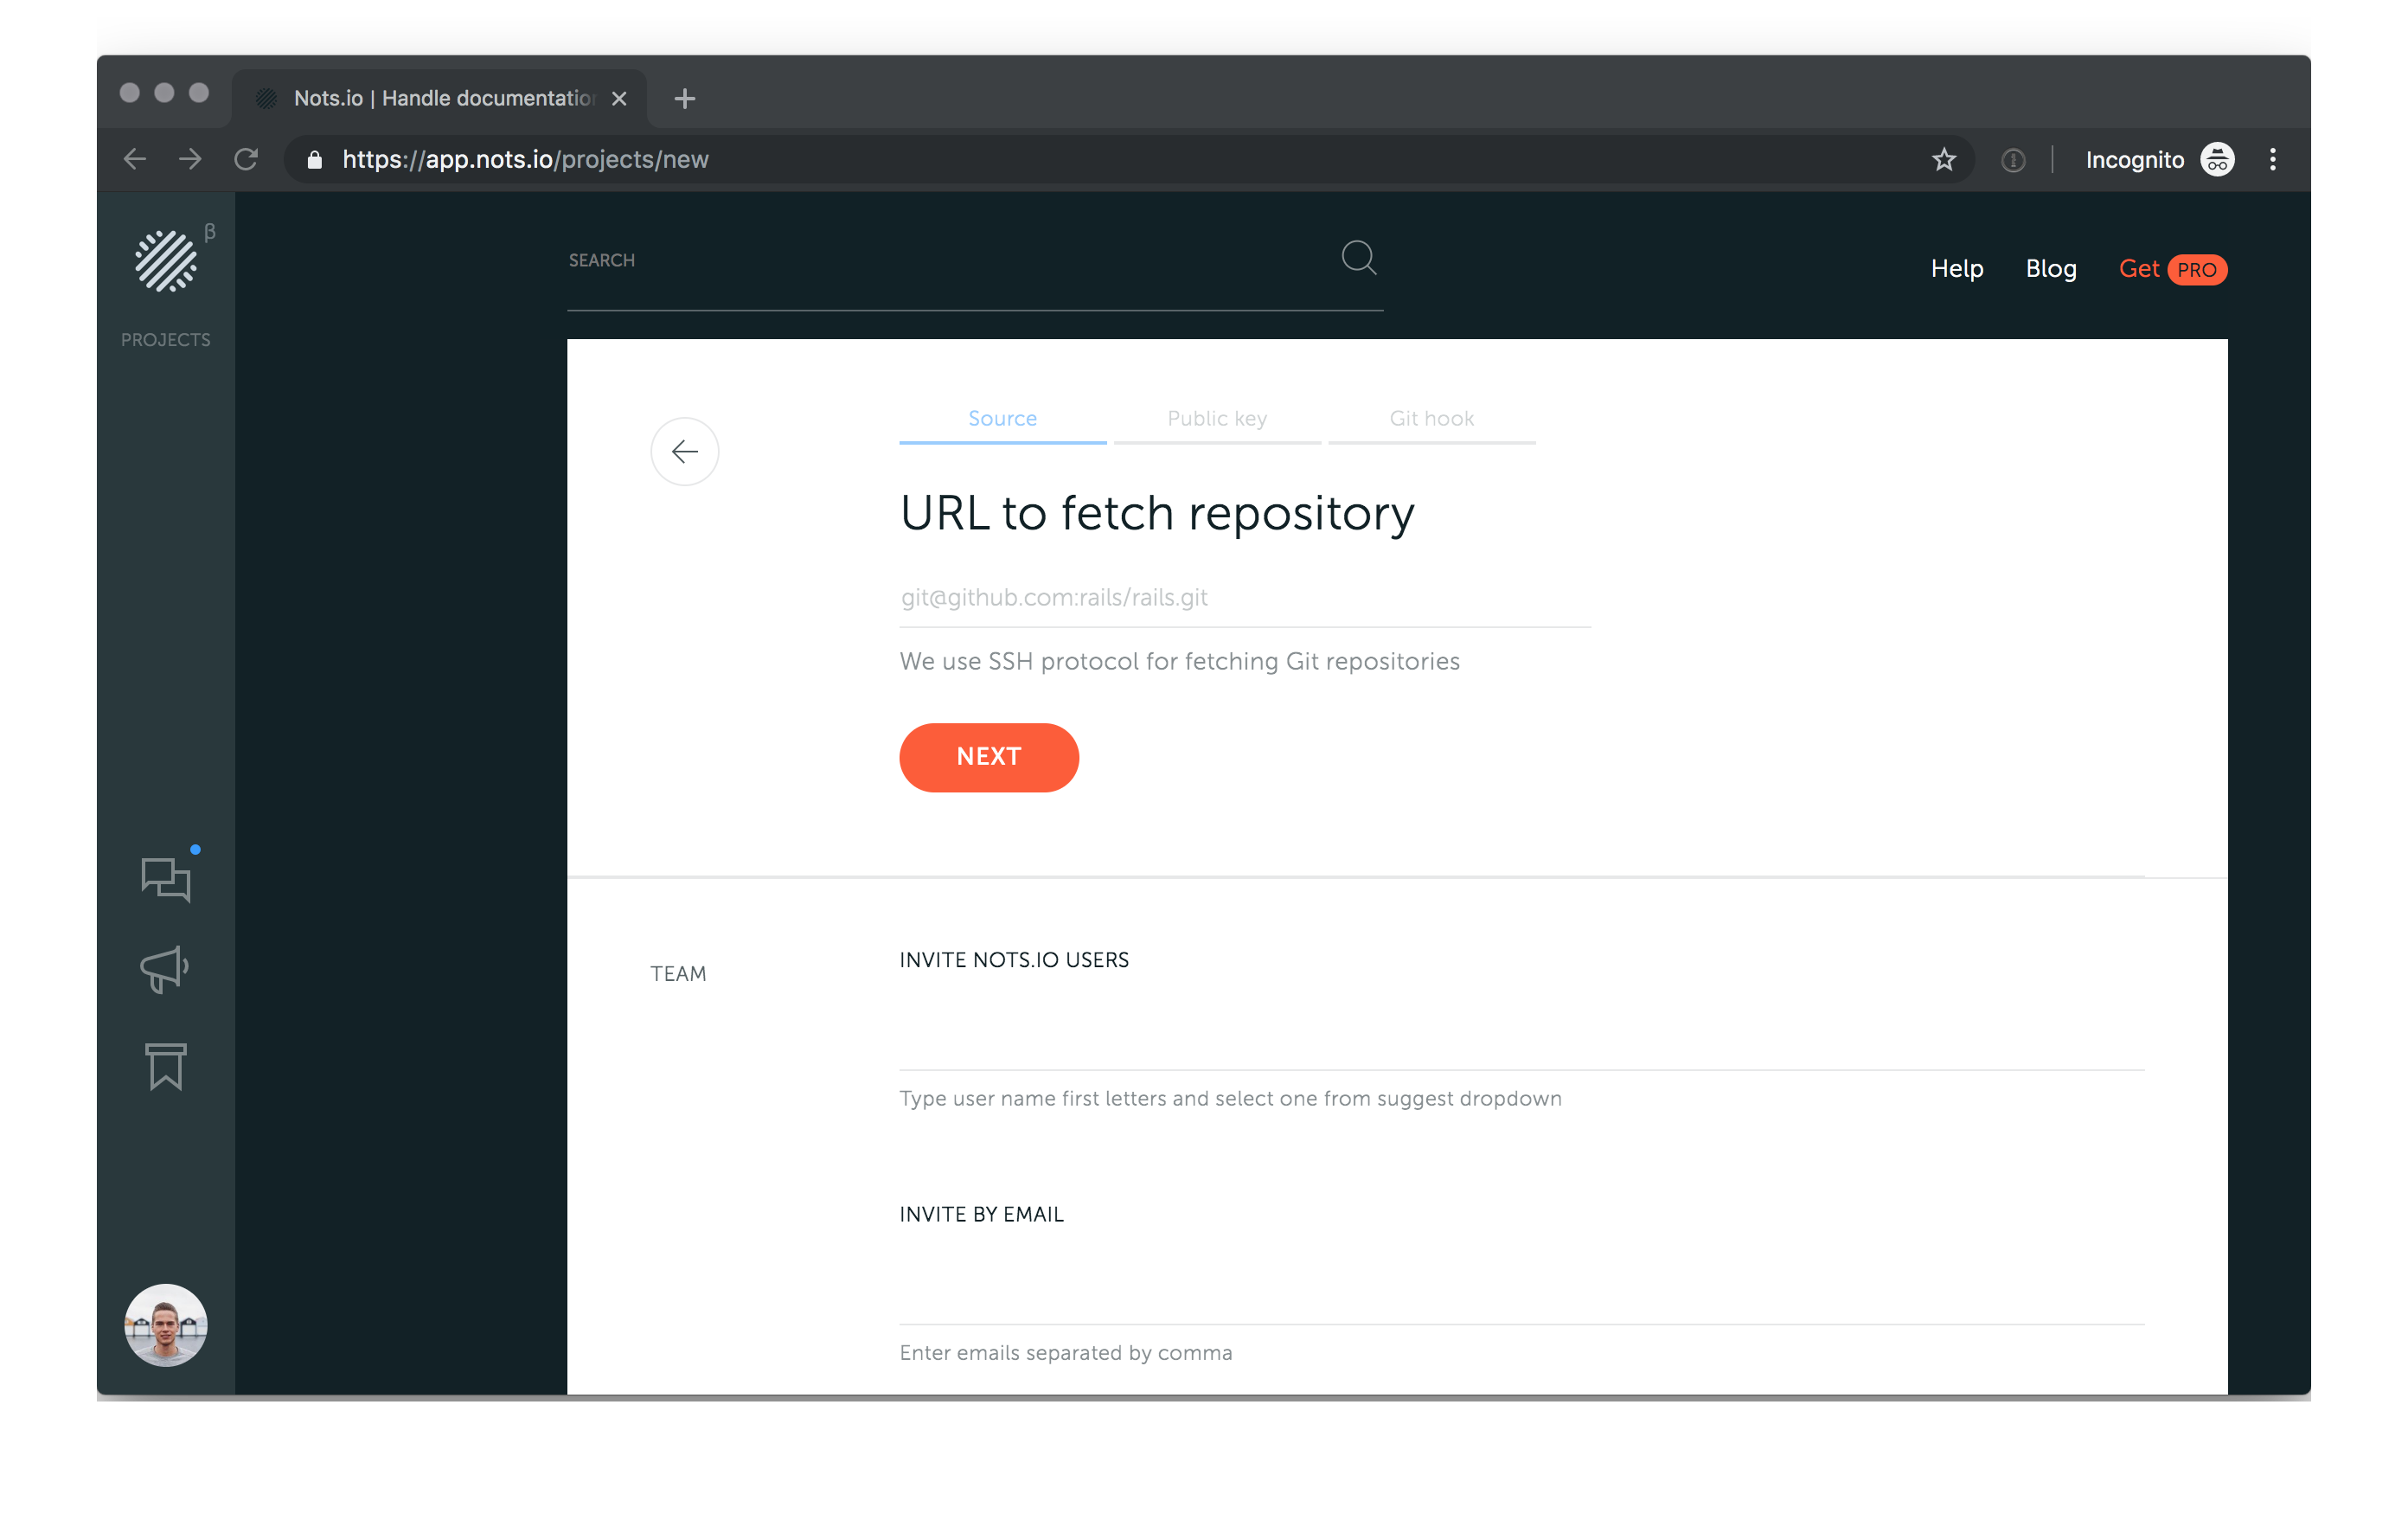
Self-hosted repository
When you choose self-hosted one, you need to manually enter an URL address so that Nots could fetch it. Usually, it looks like this: git@github.com:rails/rails.git Nots uses secure SSH protocol for getting repos.
After that, to authorize Nots to access to your git repository, add provided public key to the ~/.ssh/authorized_keys on your server to connect to the server through SSH protocol.
Nots shows the safe public part of the key. The private part is stored securely on our side in encrypted storage.
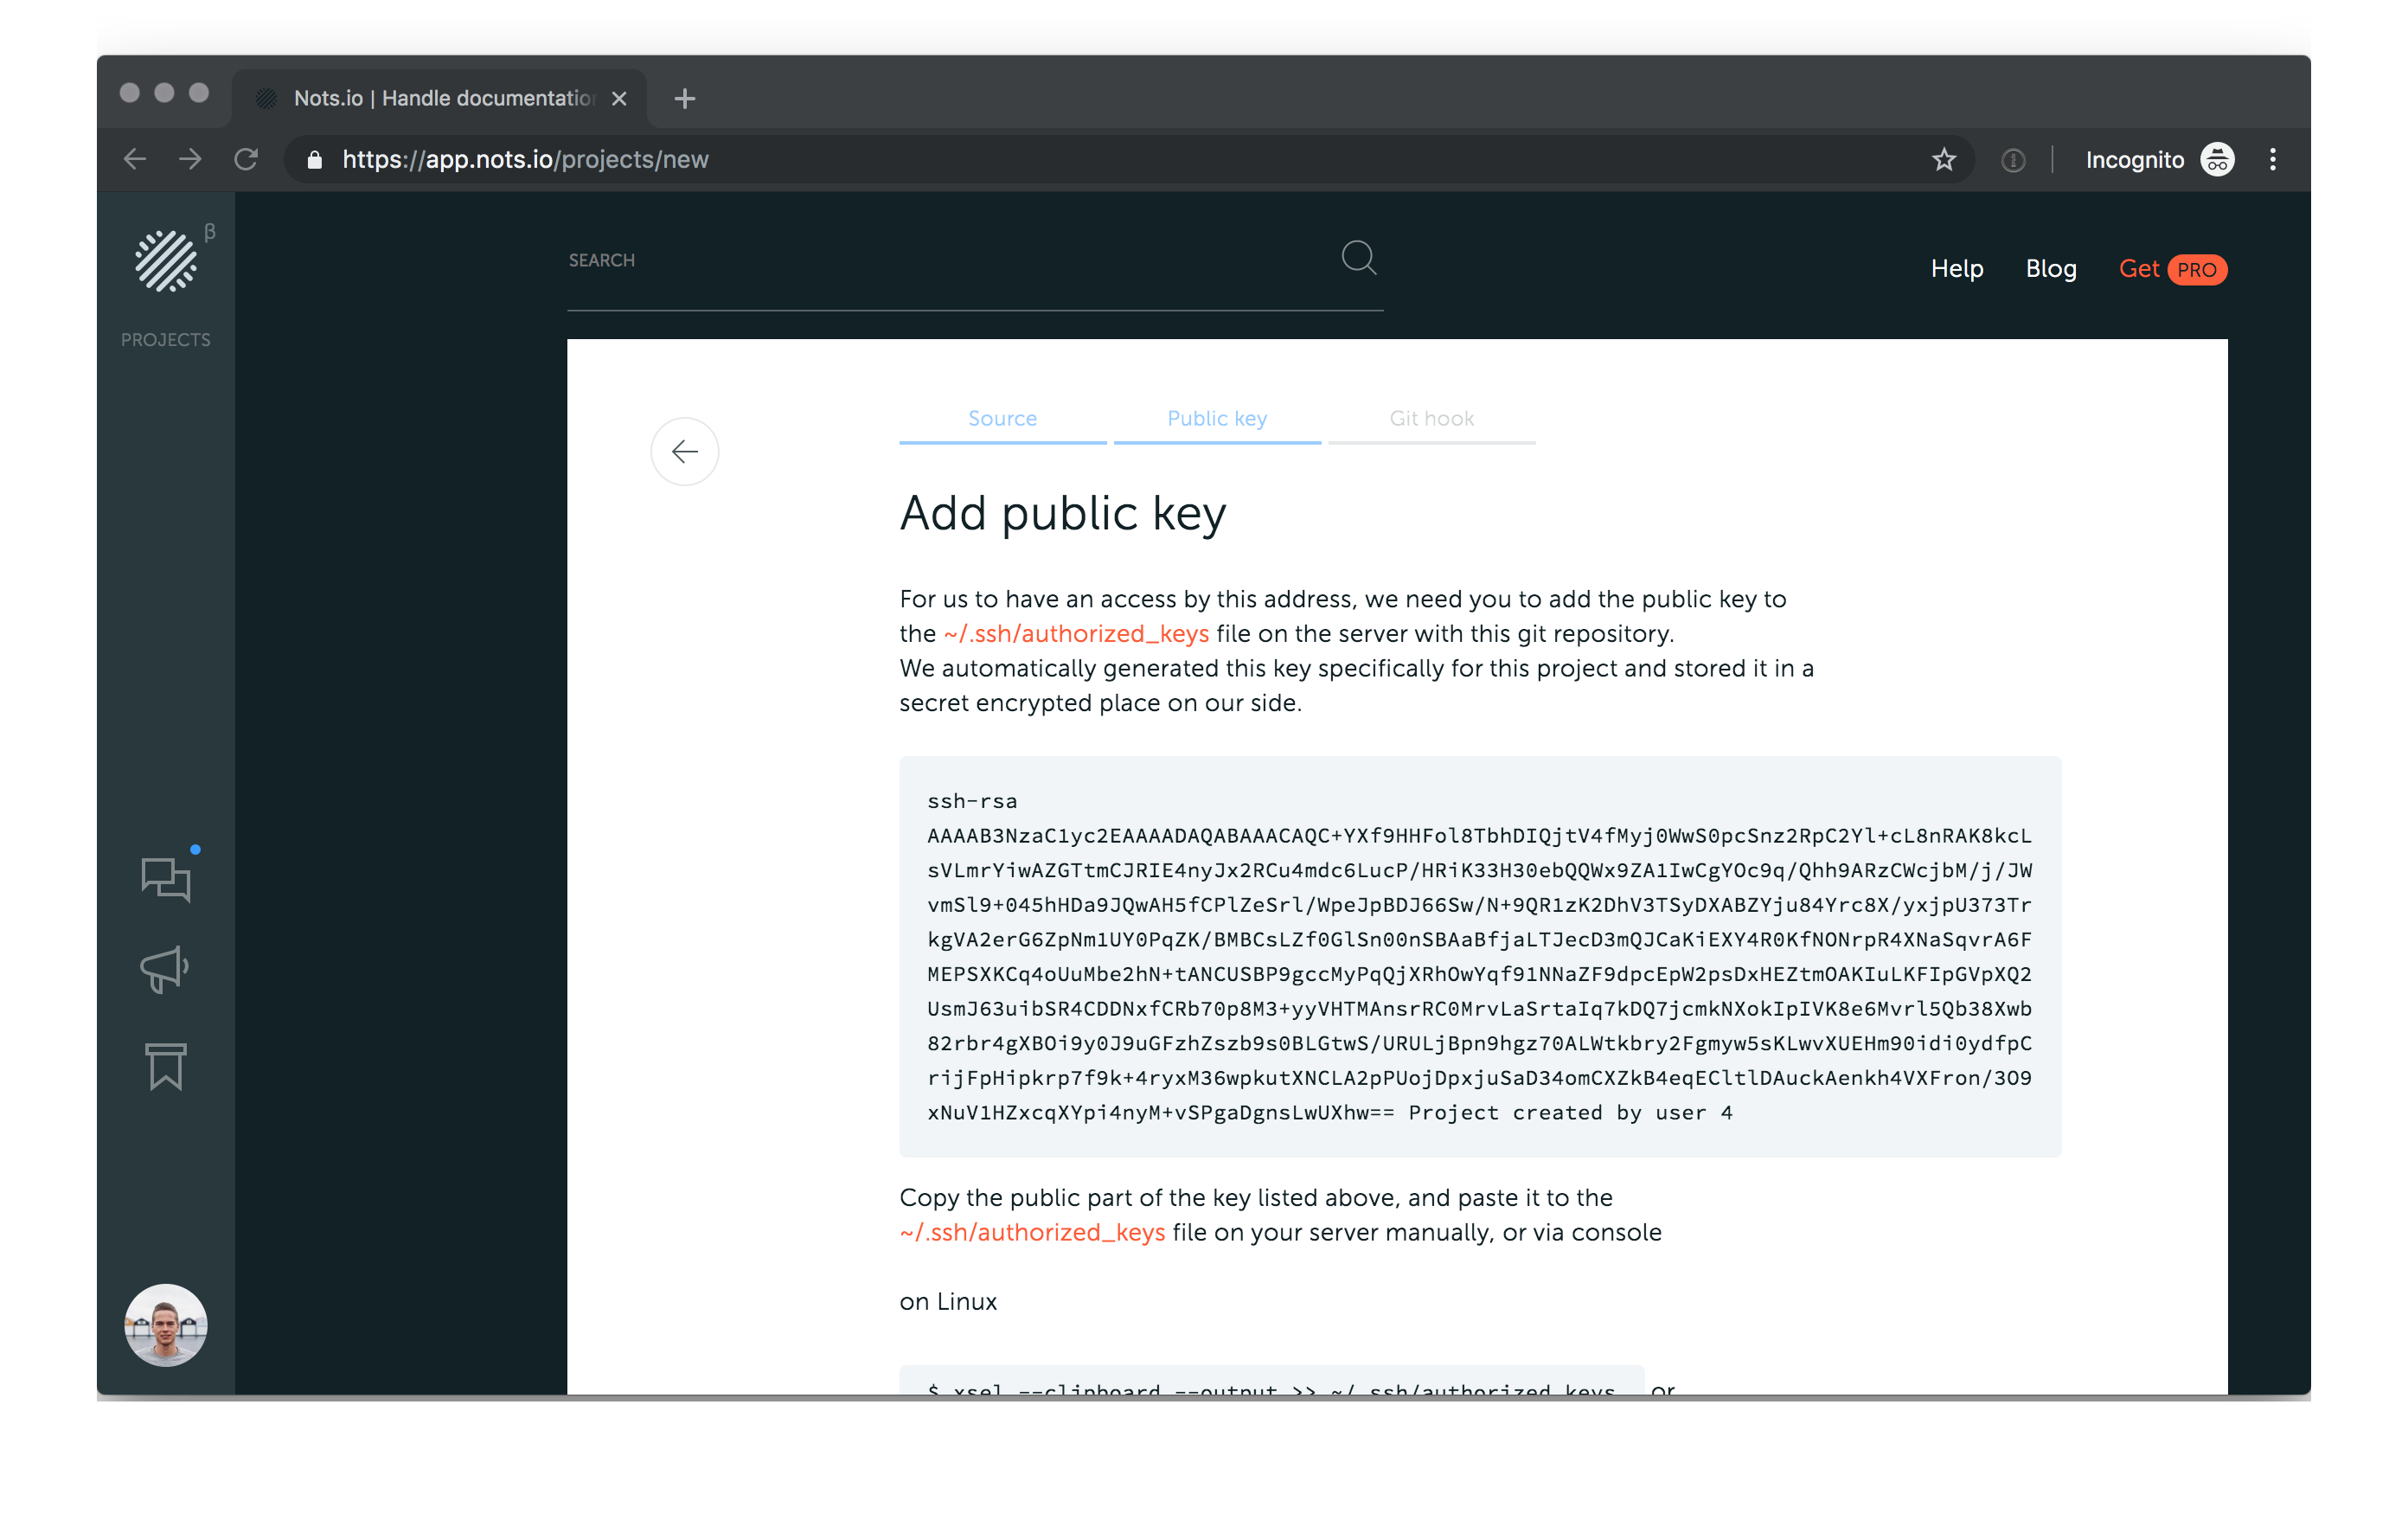
Click copy button to copy the content of the key to clipboard and then append it to ~/.ssh/authorized_keys on the server with git repo manually or with a console command.
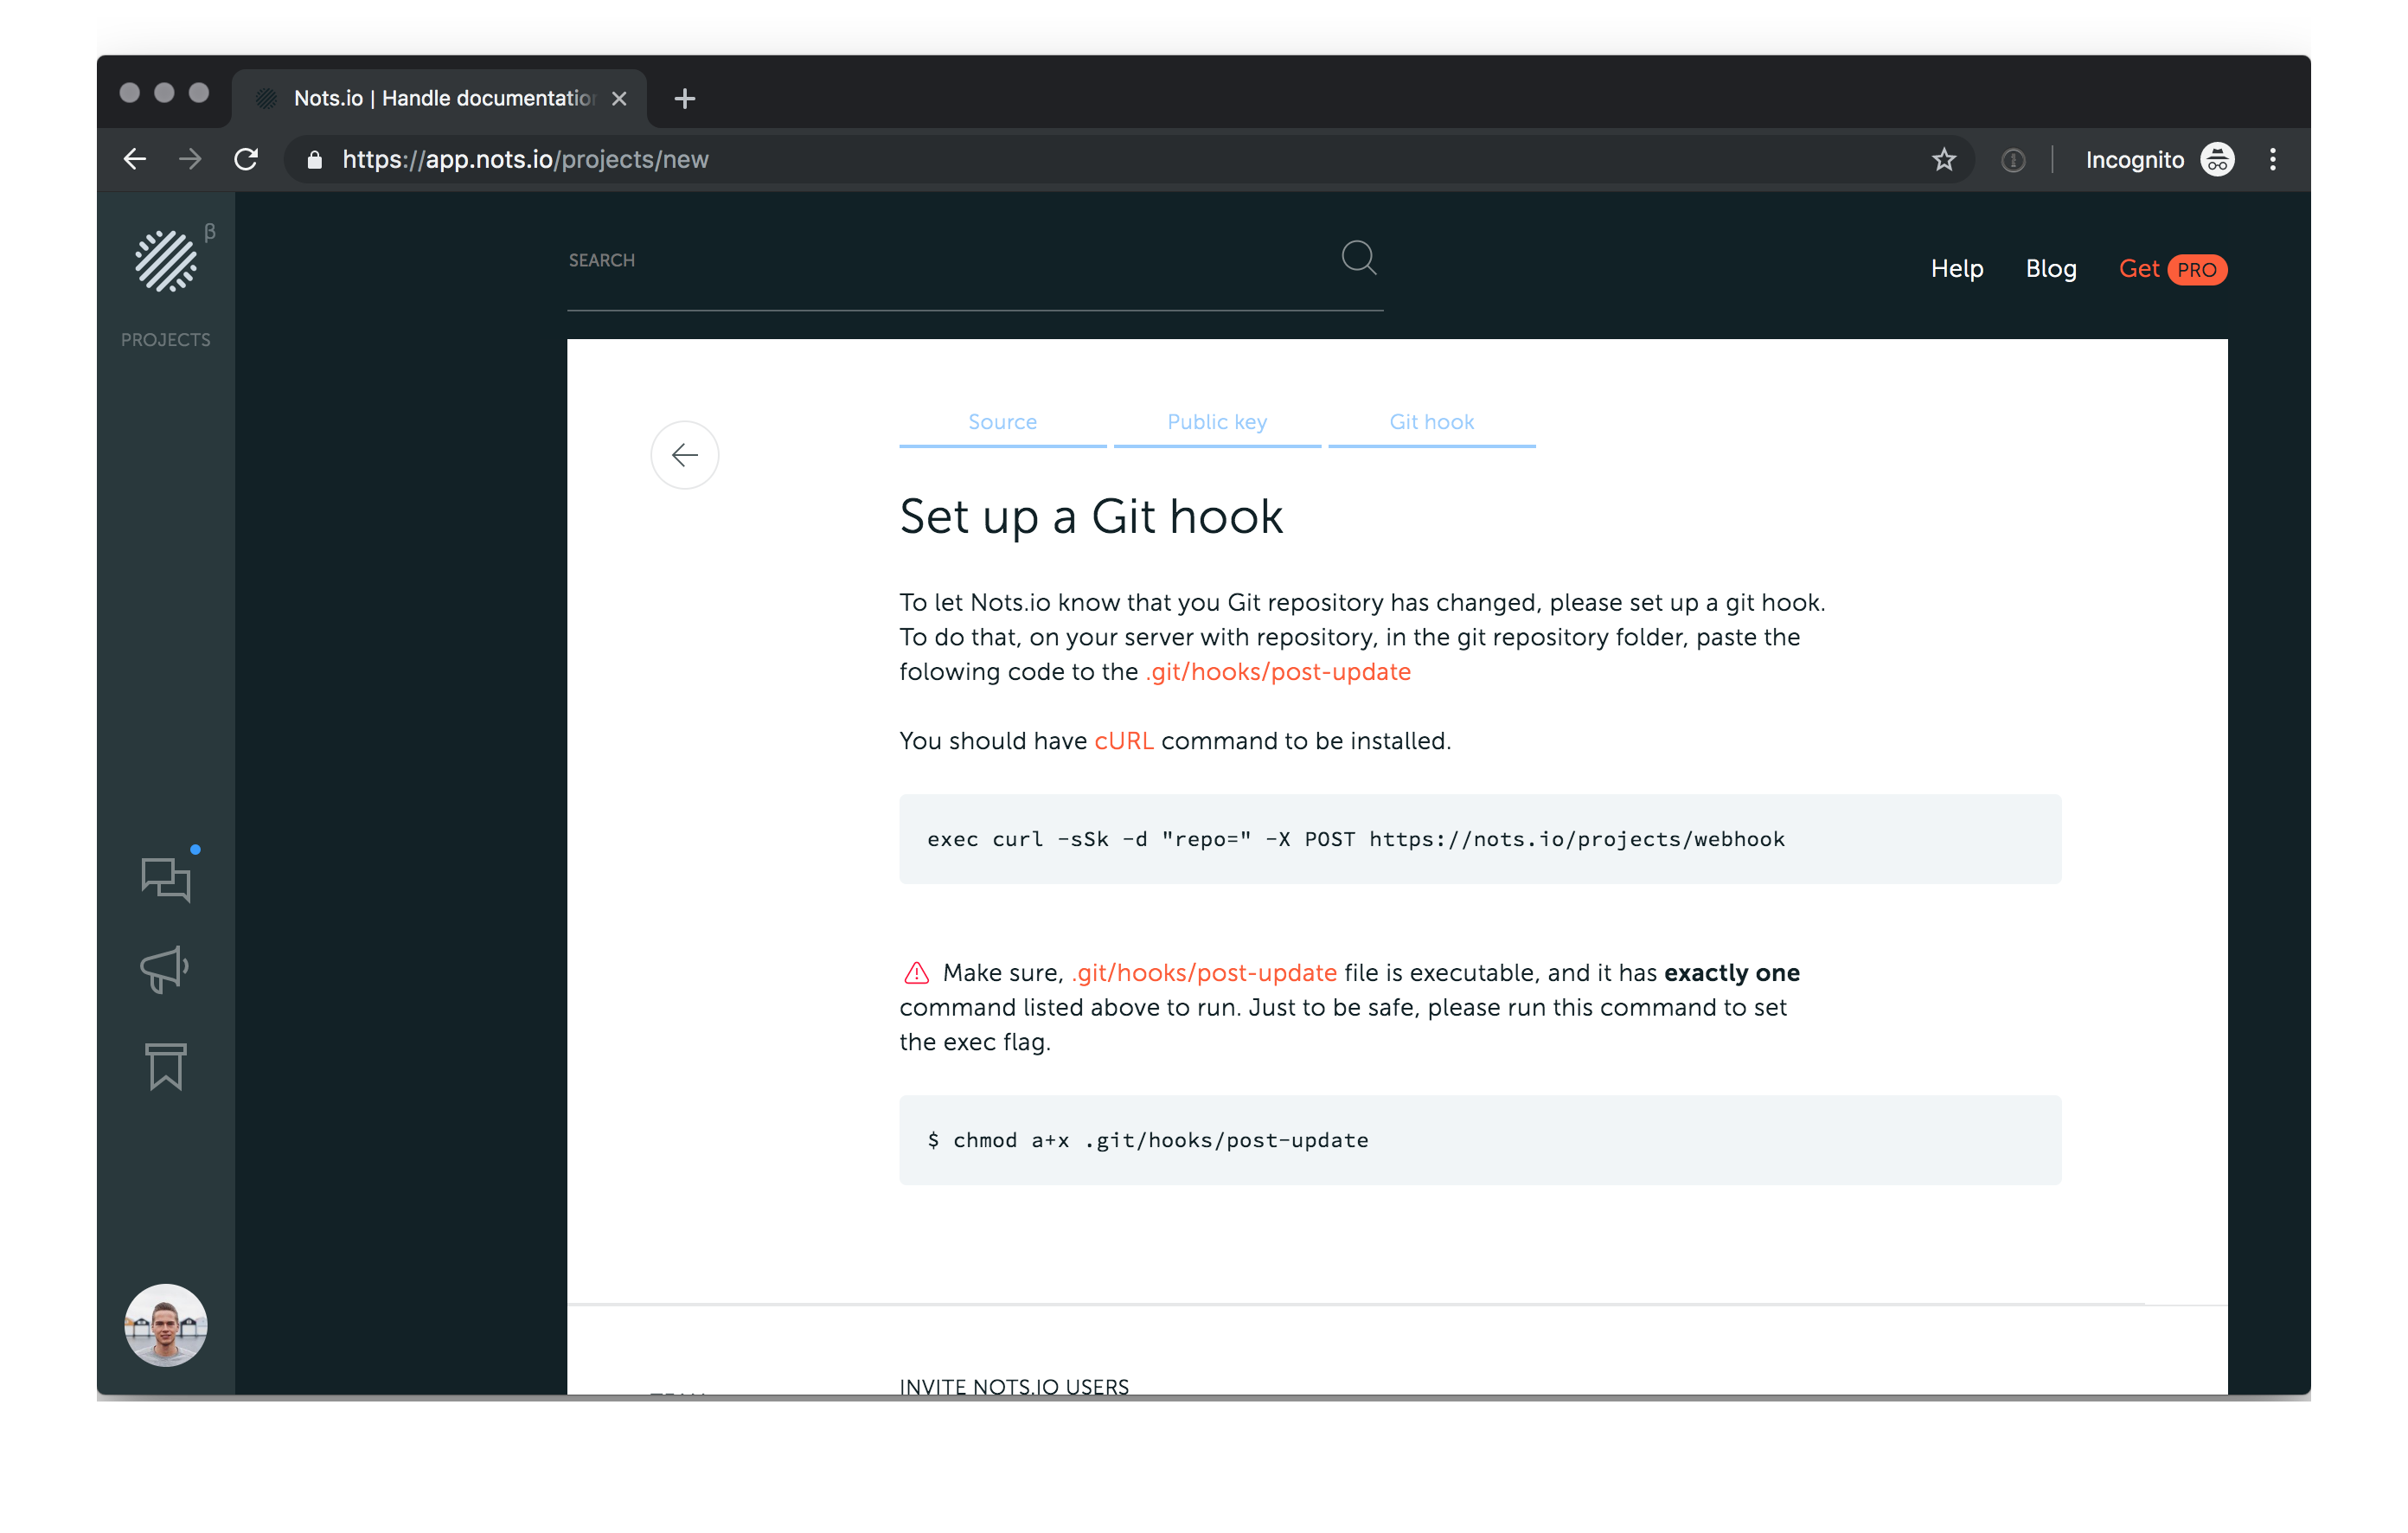
The last step is to set up a git hook. Add the provided command to the .git/hooks/post-update file. This will ping our servers when the git repo gets fresh updates. We will catch up changes and update your documentation on Nots.io
Now a repository configuration is all set and you can skip to the Team section.
Import repository from GitHub
The second option of setting up a project is to import repo from GitHub. In this case, you need to authorize Nots to access your repos list. This is the standard oAuth2 sequence of steps.
When access is granted, select one of the repos you own from the list.
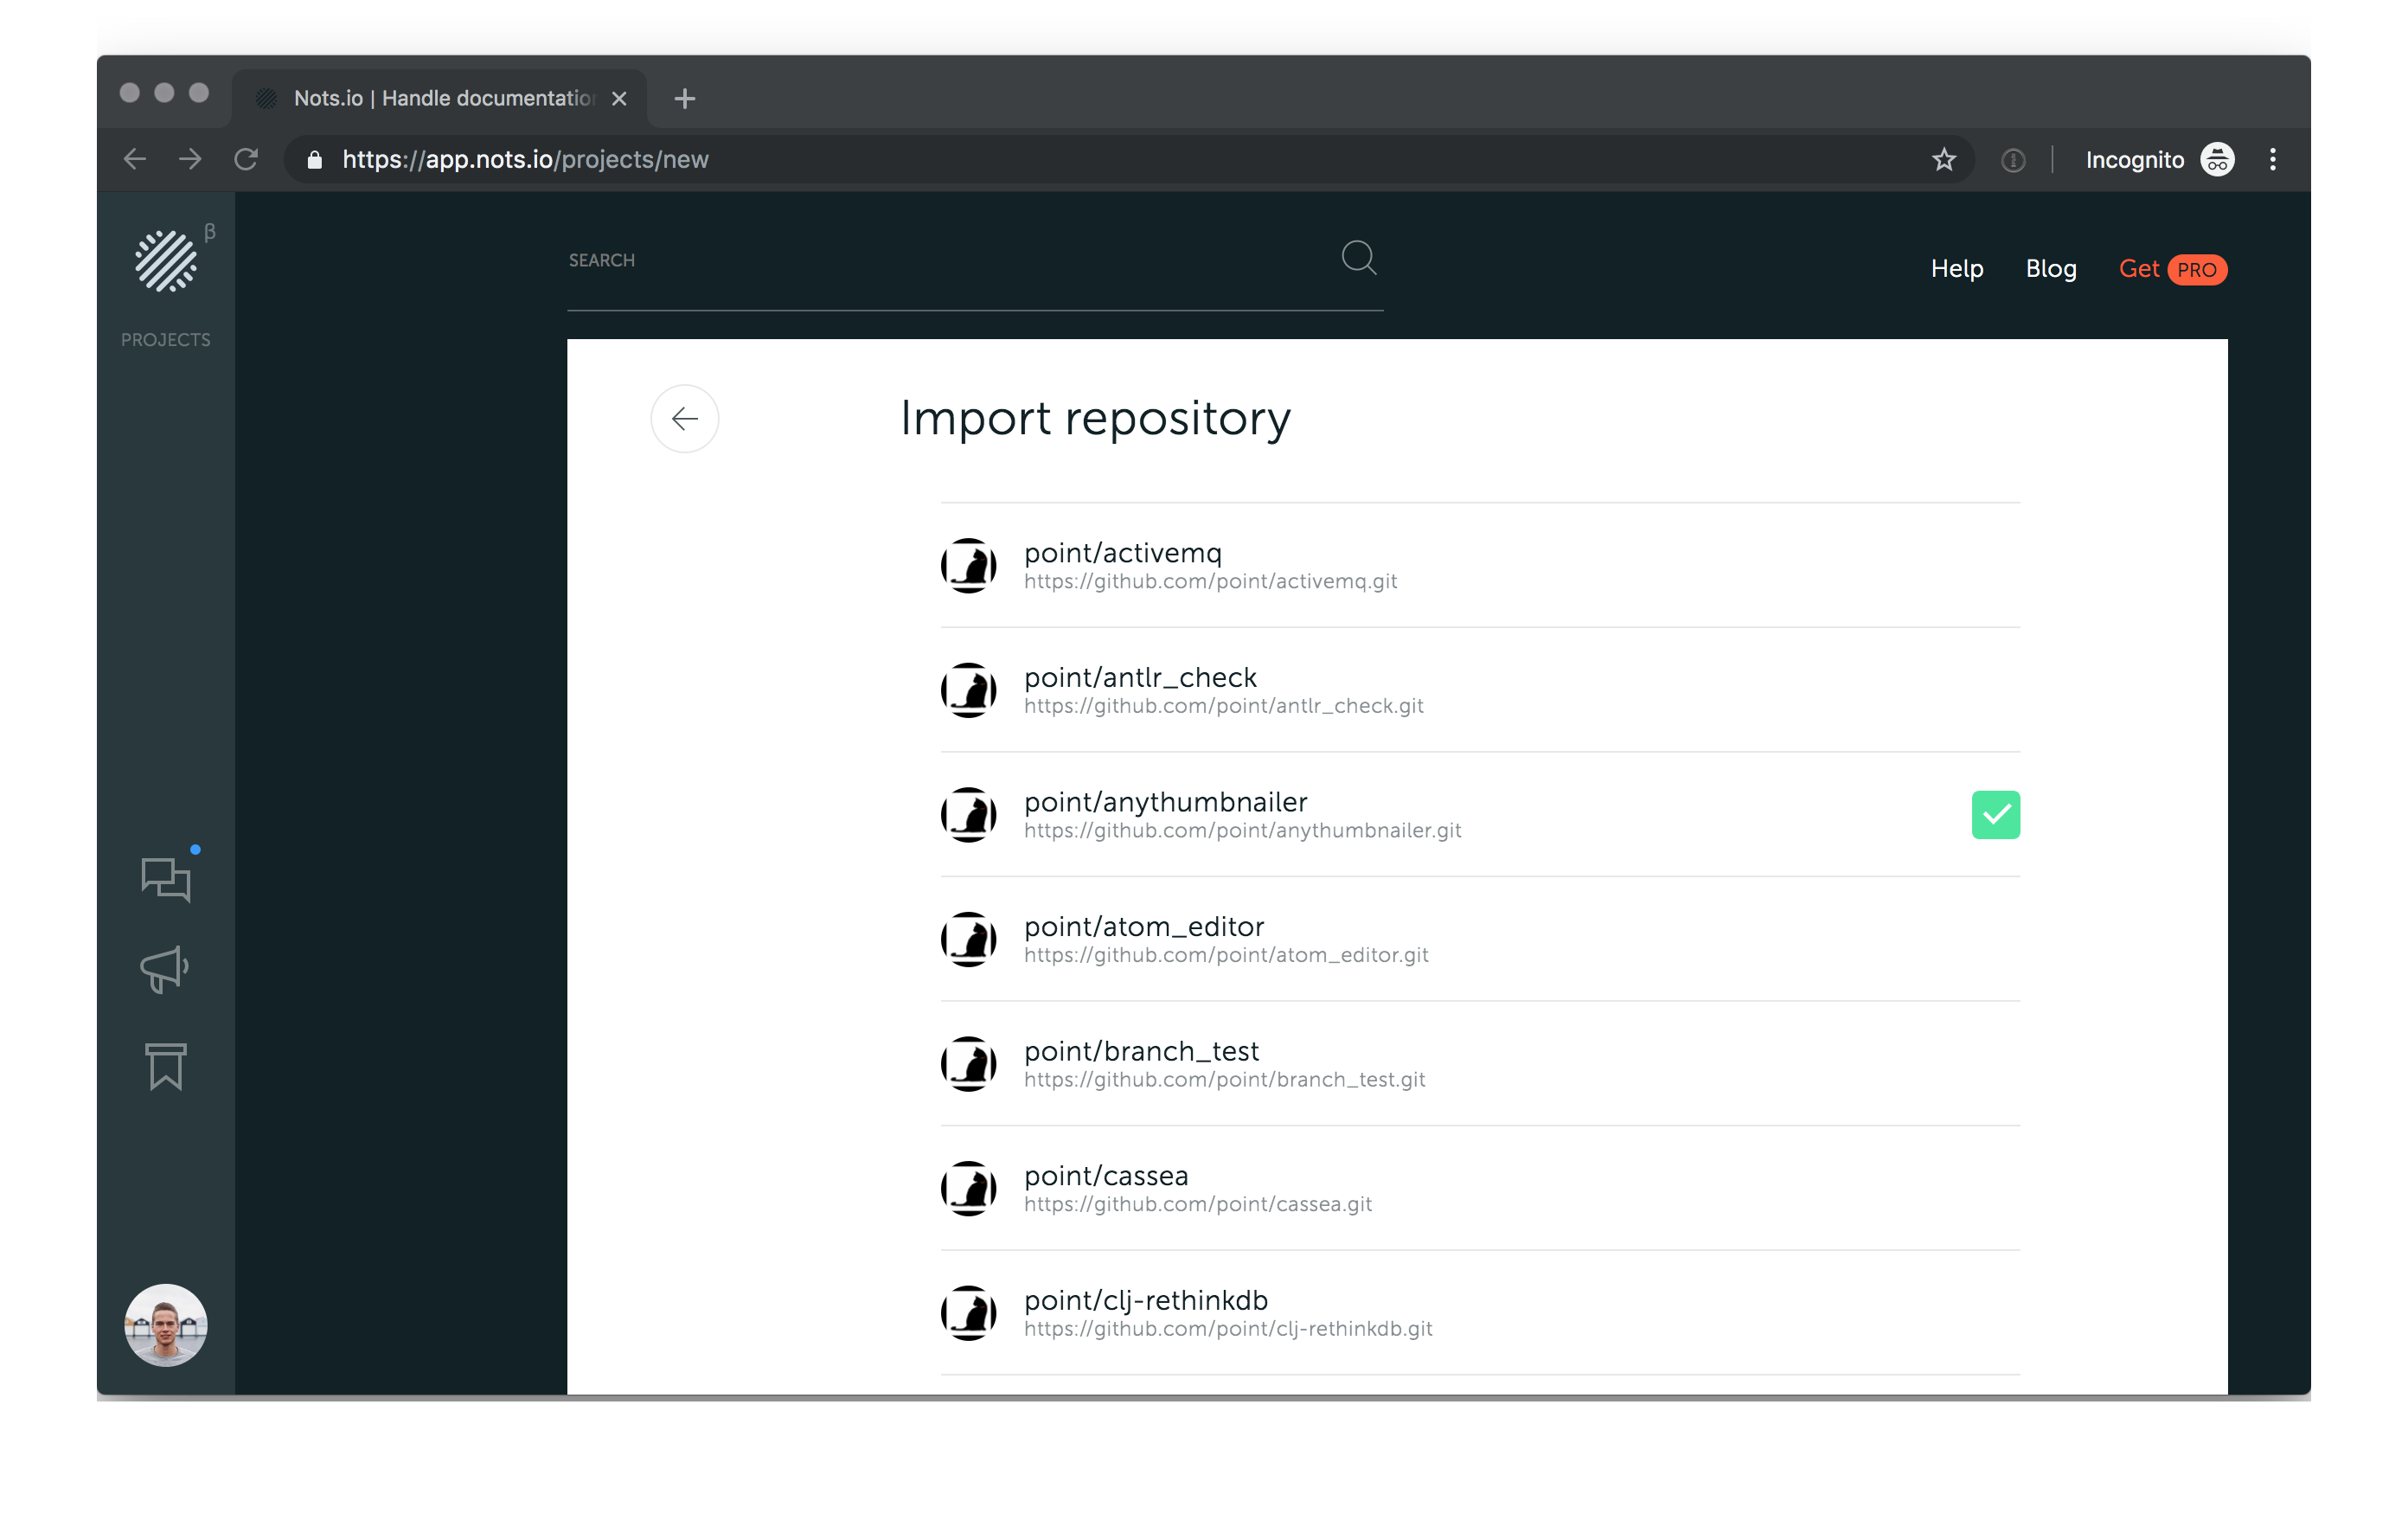
All the settings like public/private key and git hooks Nots makes automatically when you click “Create Project”. There’s no need to do anything manually.
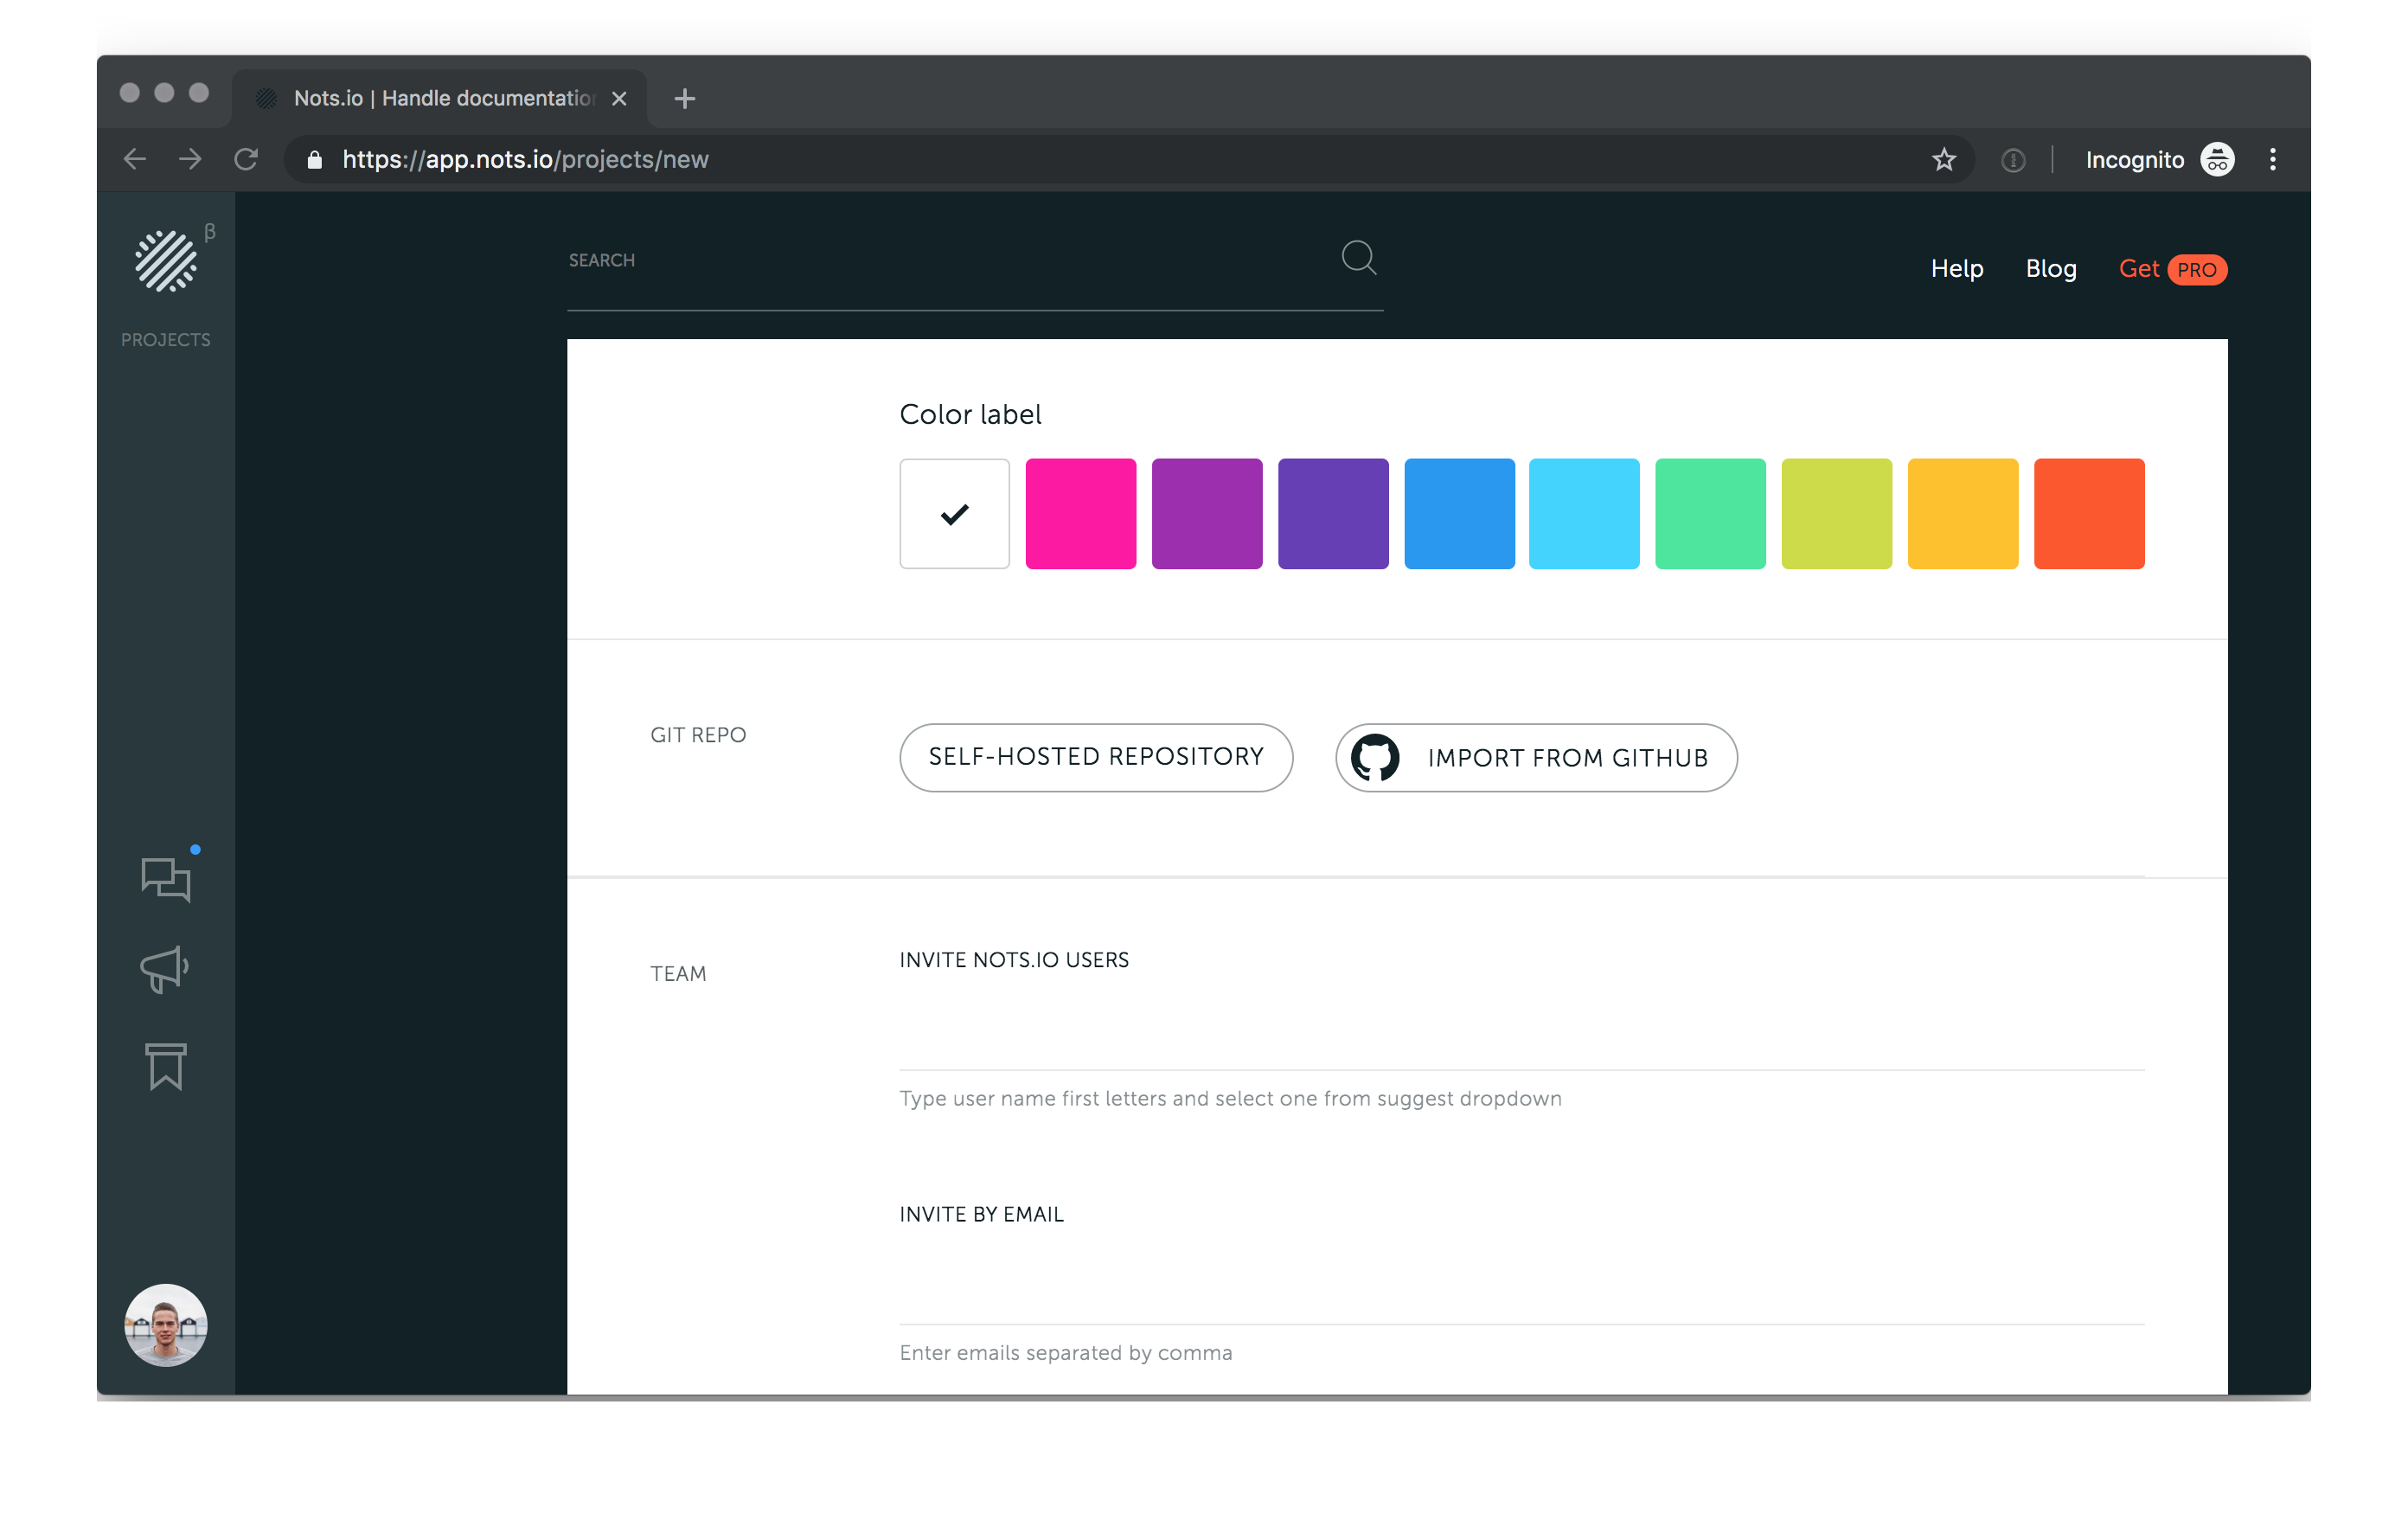
Teammates
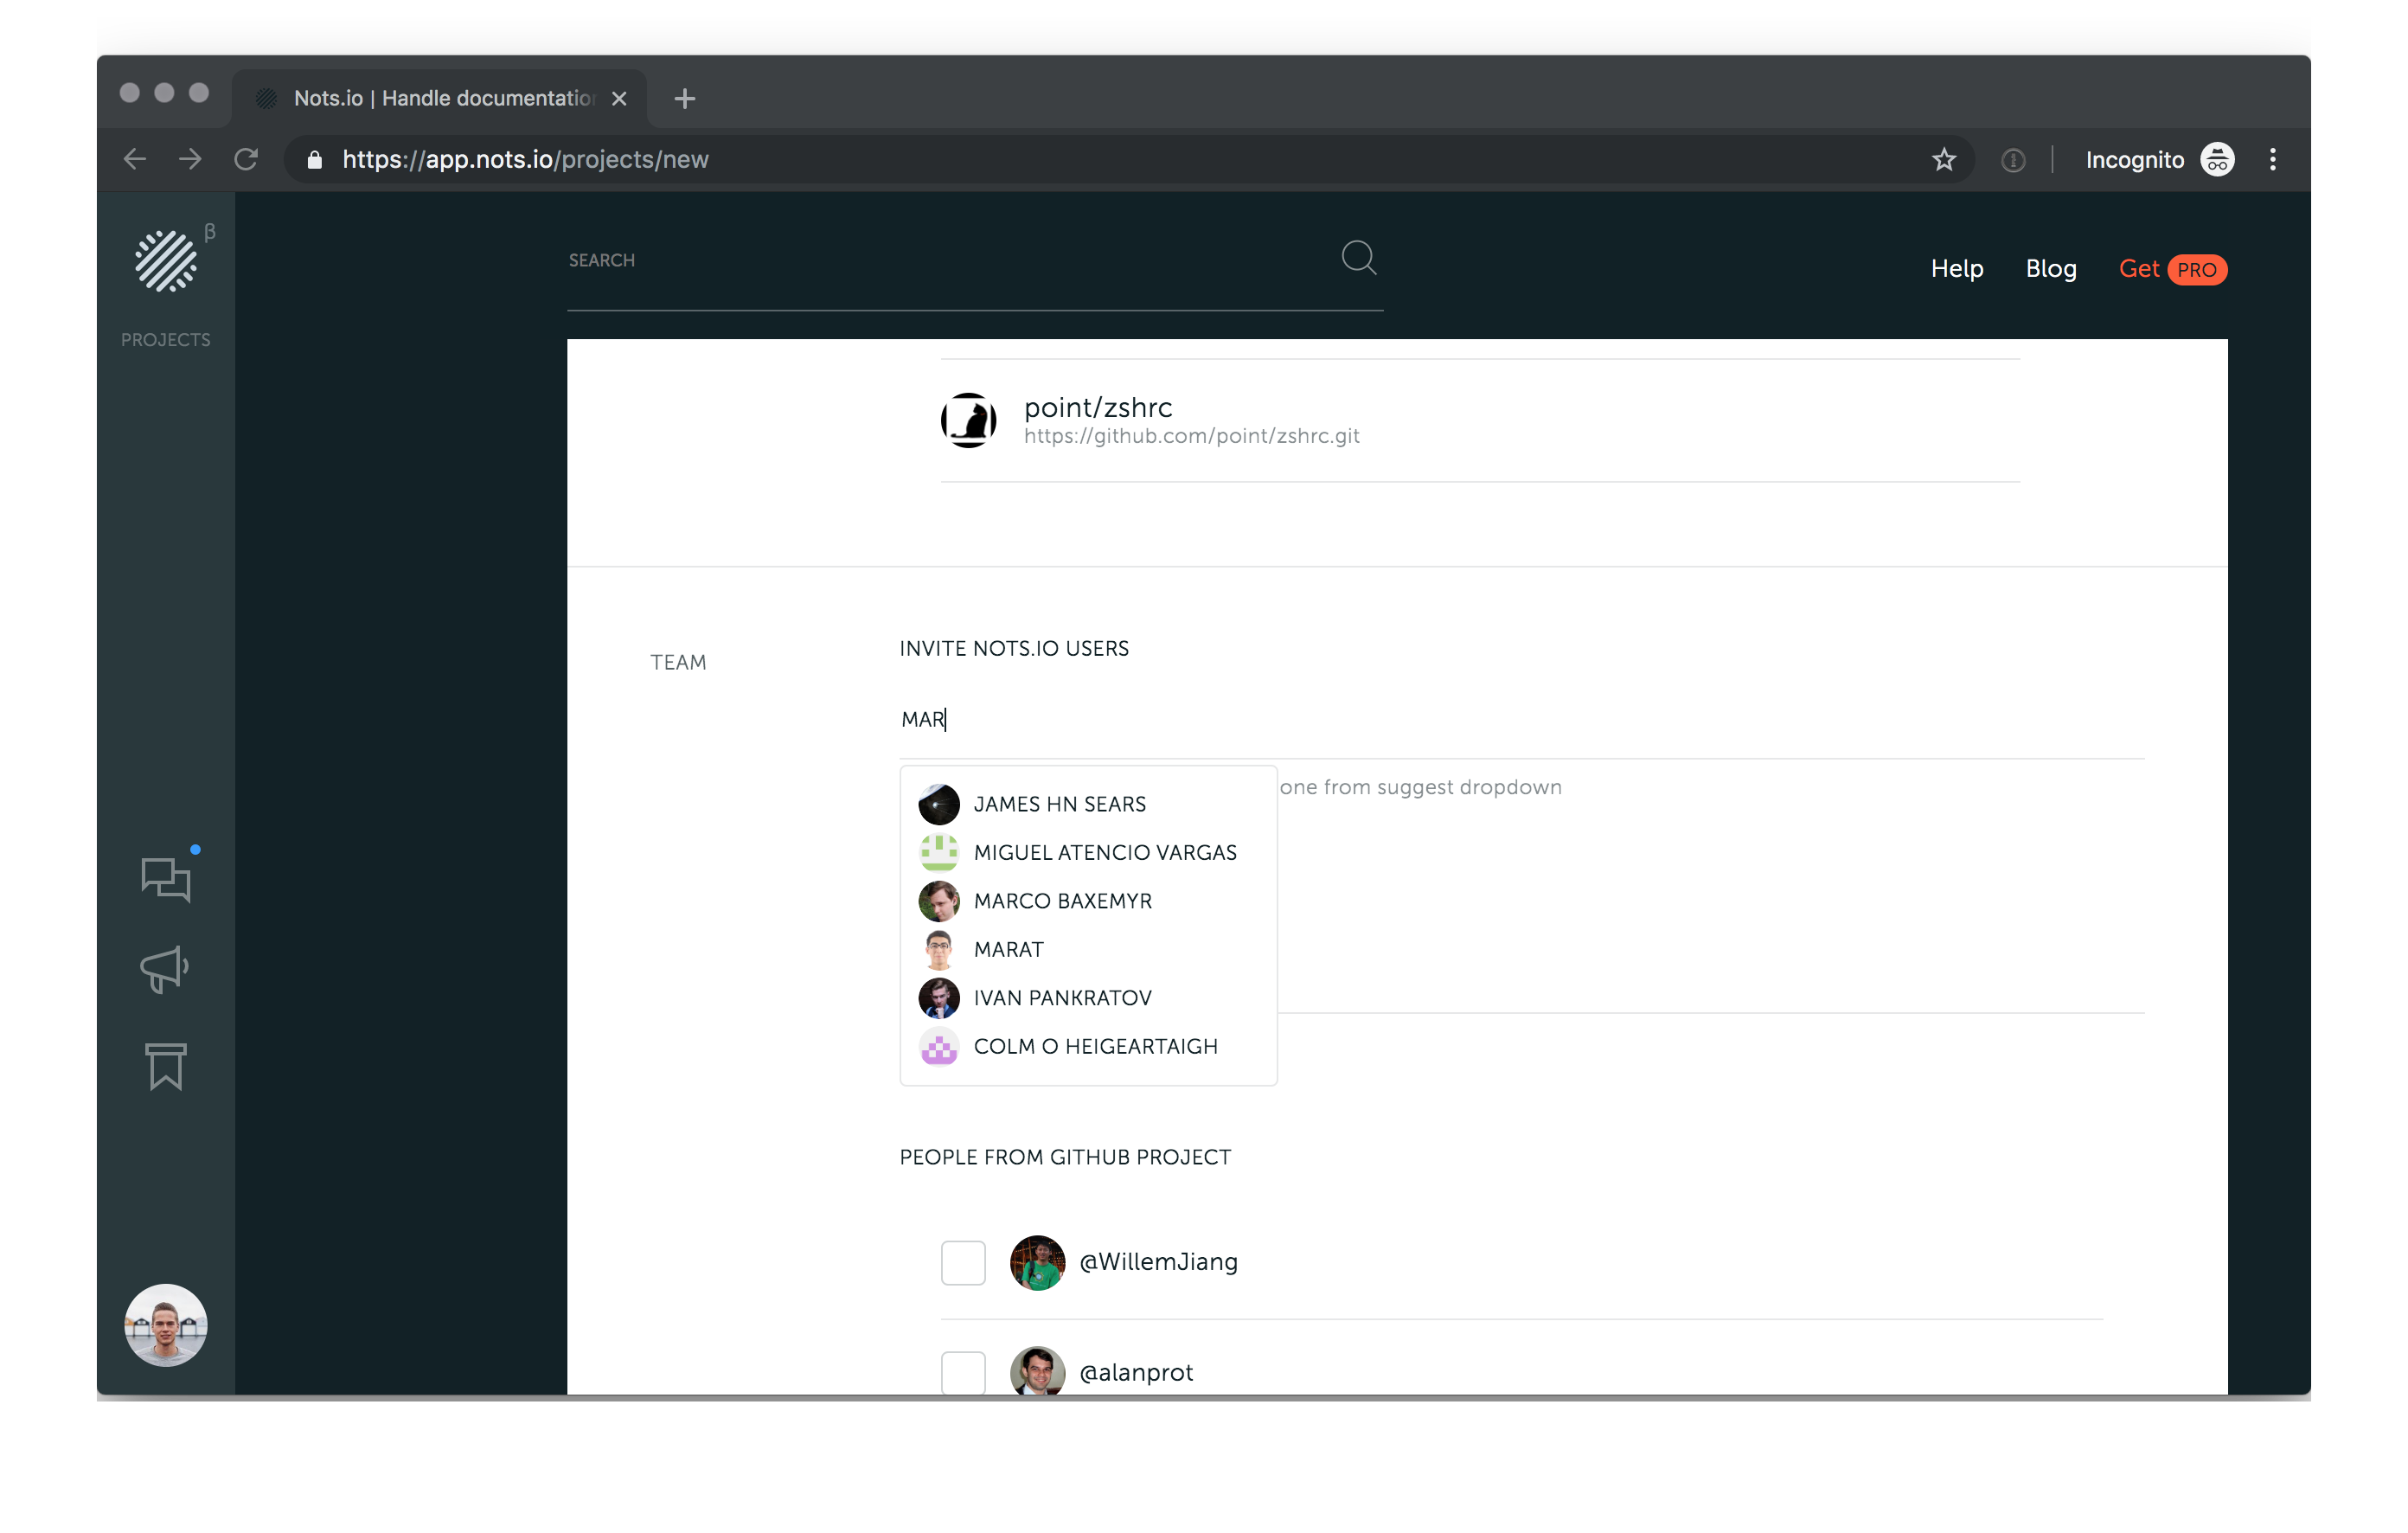
You can invite teammates to participate in your new project right from the create project page. You have an option to send an invitation to already registered Nots users. Start typing the name of a team member and select one from the suggest box.
If someone is not yet registered in Nots, you can invite her by email. Enter emails separated by comma or whitespace and we’ll send them a letter to join nots.io and invitation to the project.
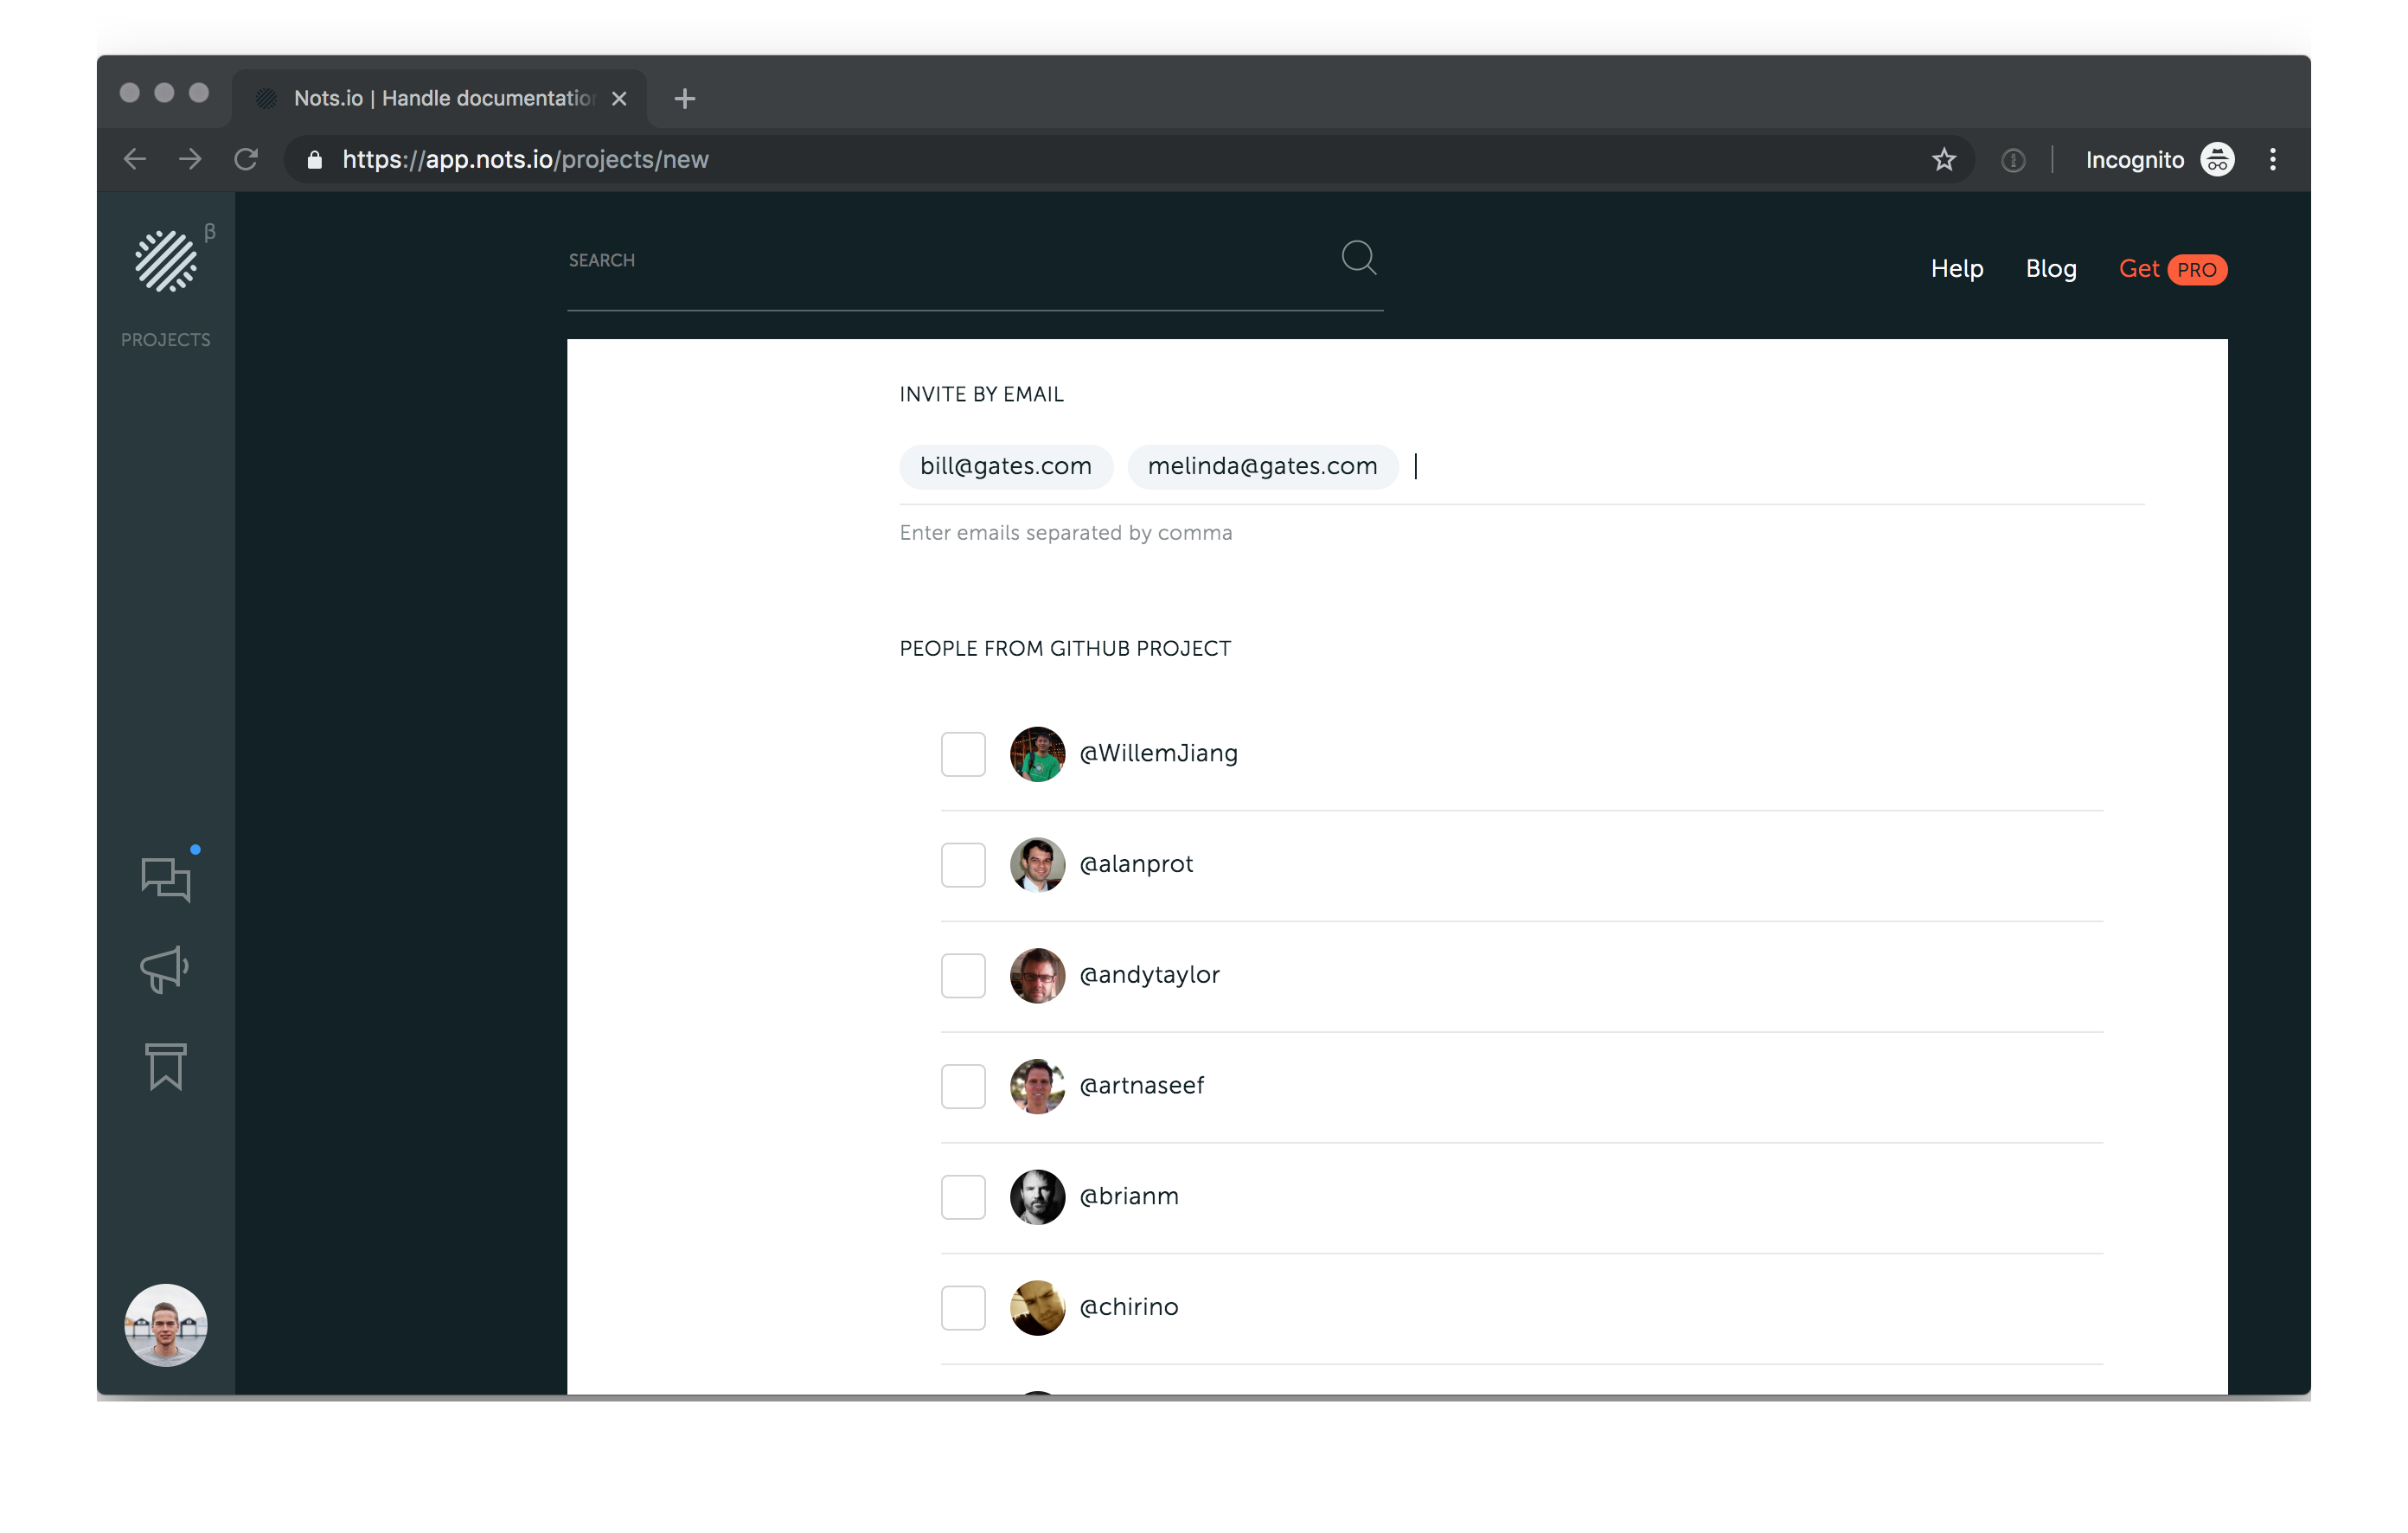
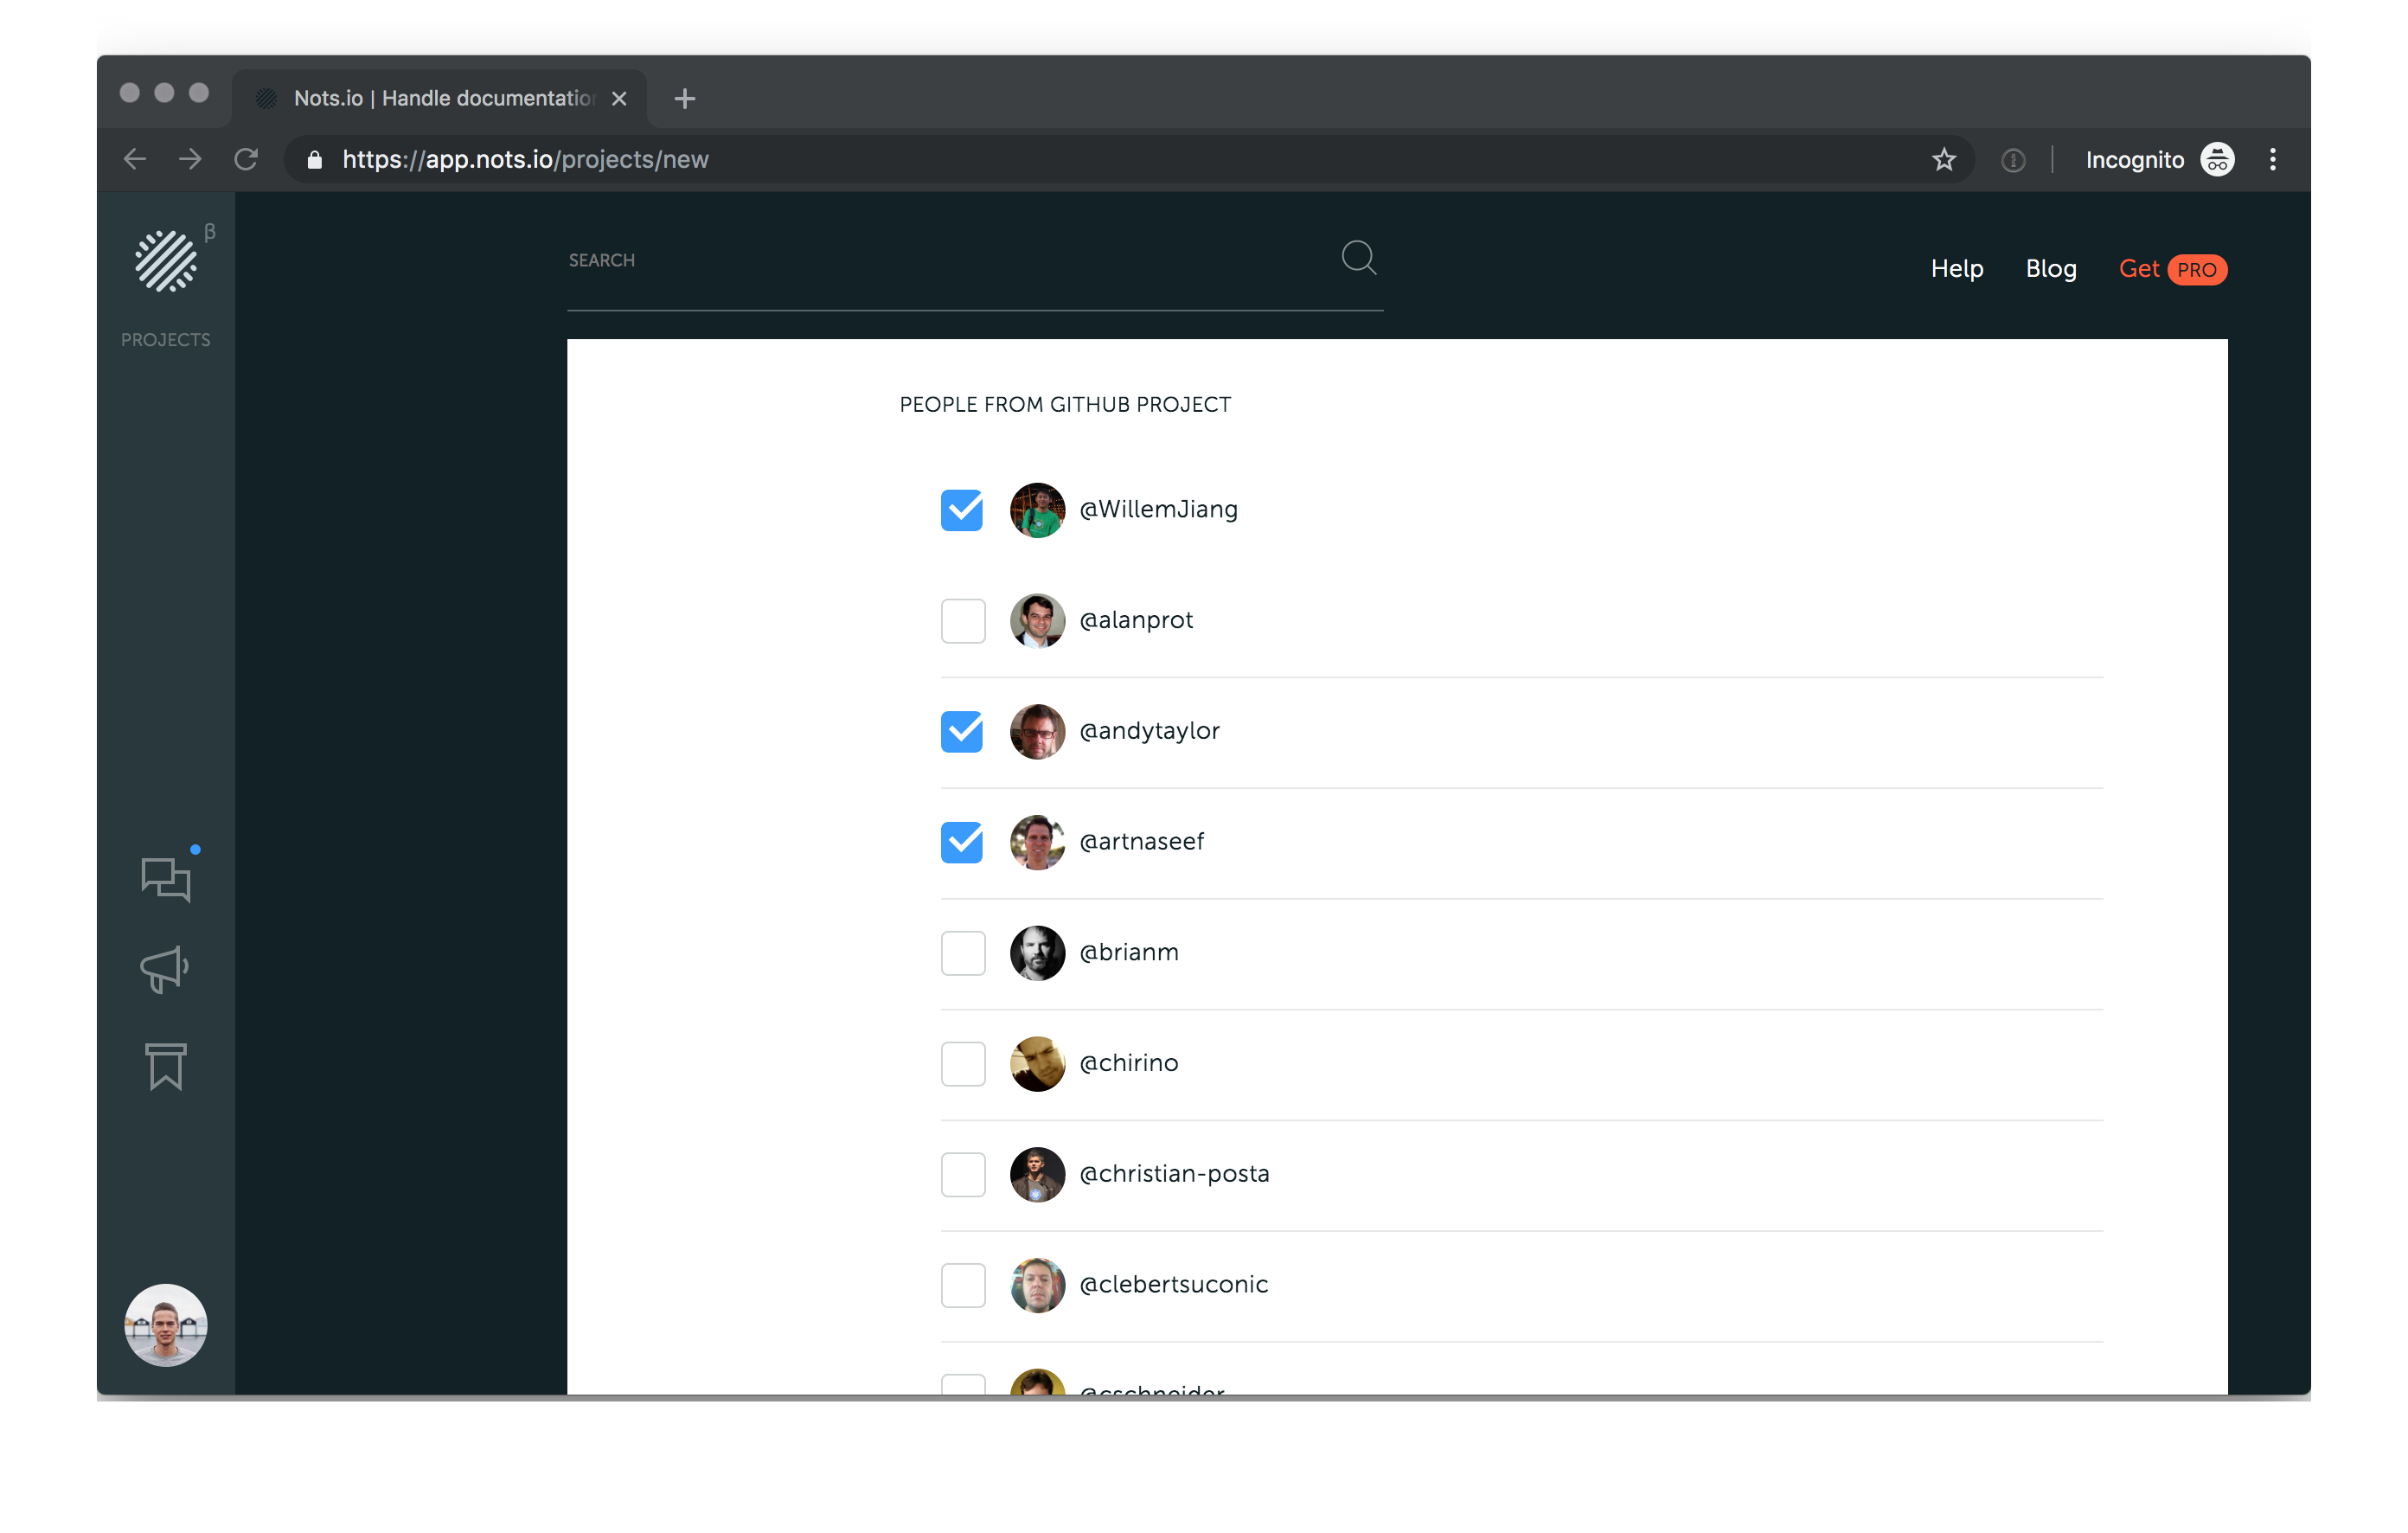
When you import your project from GitHub, Nots checks who participate in the GitHub project so that you may invite people with one click.
Now everything is set up. Click on Create Project to start collaborating and making docs for your code.